

BLACK TRUFFLE FETTUCCINE
One of the simplest recipes to make but full of aroma and exceptional flavor. You just have to cook the pasta and flavor the melted butter with the truffle slices ( for few seconds) so through the butter, all the aroma will be absorbed by the pasta. Off course you can scratch the truffle raw on pasta for a more intense scent. Healthy, nutritious, quick.
Truffles are the fruiting body of an underground Ascomyta mushroom. Low in calories, low fat, low salt and have no cholesterol. They provide an enormous amount of dietary fiber, proteins, potassium, vitamin A, vit D, vit C, vit B6 , calcium, iron, magnesium.
In Latin called “terrae tuber” (excrescence of the earth) or simply tuber, it was highly appreciated by the ancient Romans who had copied the culinary use from the ancient Etruscans. Even the Greeks used truffles in their cooking, as demonstrated by the philosopher Plutarch of Chaeronea in his manuscripts ( 1 century d.C )
In Italy it is always possible to collect truffles, except during the period of the end of april. Traditionally, the harvest was done using a pig. The problem with this method is that the pig is very greedy for truffles and it must be held back to prevent it from eating the product. For these reasons, nowdays are used only duly trained dogs


Ingredients for 2 persons
1 black truffle thinly sliced
200 gr fettuccine
Butter 100 gr
Olive oil 2 tbs
1 clove garlic (optional)
Salt
1.Bring the water to a boil. Season with the salt
2.Cook the fettuccine in the boiling water until al dente.
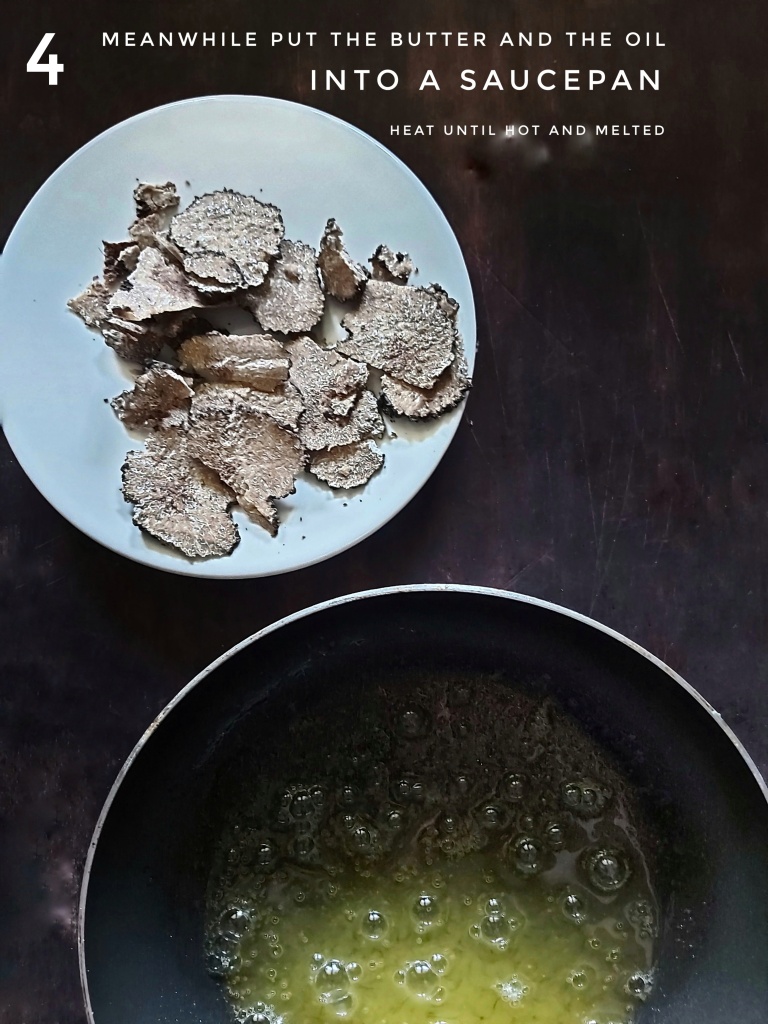
3. In a medium-sized saucepan, heat the butter & oil until butter it has melted.
4. Add the garlic and the black truffle slides. Cook for about 30 sec.
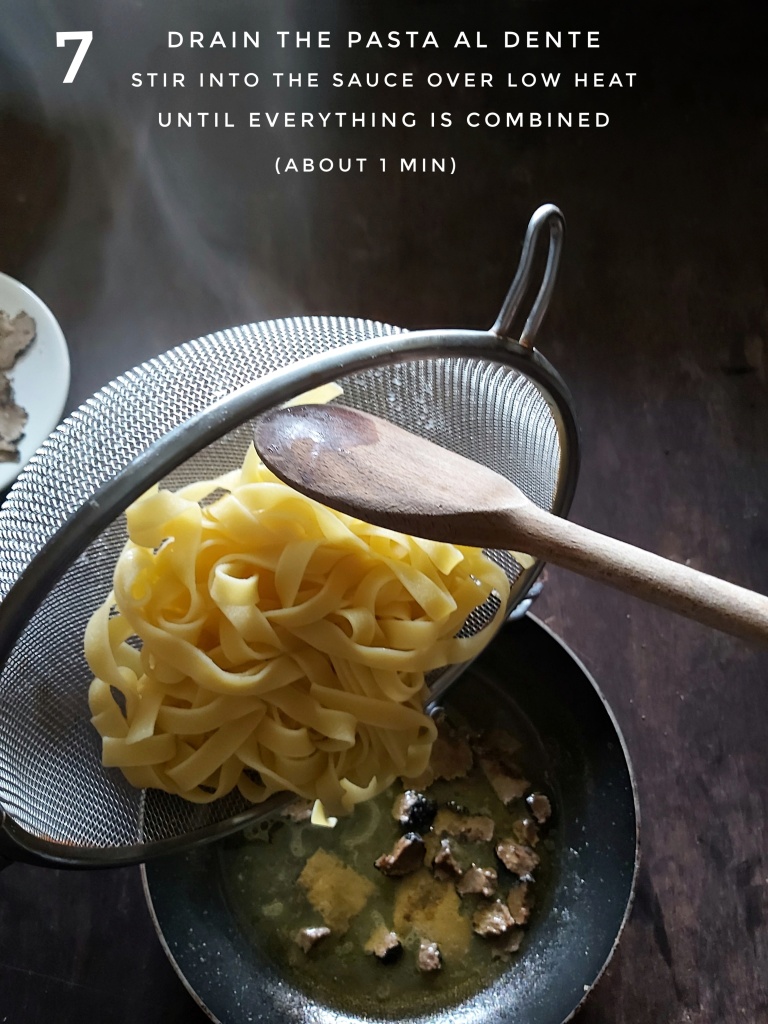
5. Add half cup of the pasta cooking water into the pan with the butter & truffle. Let boil the sauce. Drain the pasta. Must be very al dente because cooking will continue in the sauce
6. As soon as it starts to boil, add the drained pasta into the butter sauce. Toss over medium heat to coat the pasta.
Serve if you desire with Grana Padano cheese, ground pepper and fresh grated truffle. Serve with the aromatic red Nebbiolo wine from Piemonte region or – if you prefer a rustic flavor – with Pinot Nero from Mugello (Tuscany) .
Buon appetito.
To preserve all its aroma, a truffle should not be cooked too much. Add them just before consuming the meal, at the end of the cooking. In fact, eating fresh, just-harvested truffles raw is a great way to savour the taste of them


See above step by step the procedure
Christmas time

To all of you, to each of you, we send our best wishes from the depth of our heart.
Thoughts and prayers from the deepest lay of our soul,
especially to those who suffer,
to those who are hospitalized,
to lonely people,
to those all who have a tear in the eyes.
May health, smiles and serenity return into the life of each one of you.

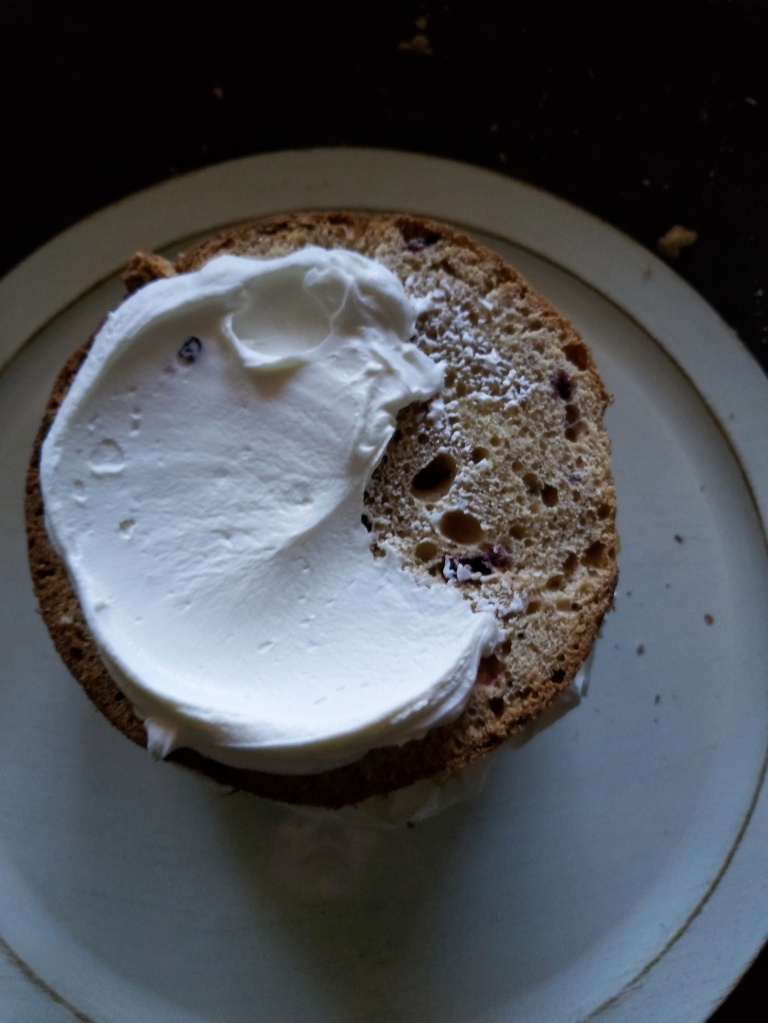
Panettone filled with cream (No cooking recipe)

- A delicious Christmas dessert, easy to prepare without cooking in less than half an hour. Just mix 2 milk products. One is typical Italian: mascarpone; the other typical Greek: yogurt. Add icing sugar, mix well these 3 ingredients and the cream is ready to fill the panettone.
- Mascarpone is an Italian soft cheese made from cream and resembling cream cheese. It is recognized in Italy as a traditional “Agri-food product”. It is used in various Lombardy dishes and is considered a specialty in the region. Is one of the main ingredients of the typical Italian dessert “Tiramisu”.


Ingredients: (For this recipe has been used “Flegga” Greek yogurt & “Galbani Santa Lucia” Italian mascarpone cream cheese)
1 panettone 800 gr – 500 gr of mascarpone – 300 gr Greek yogurt – 150 Icing sugar – 300 gr orange jam
Method:
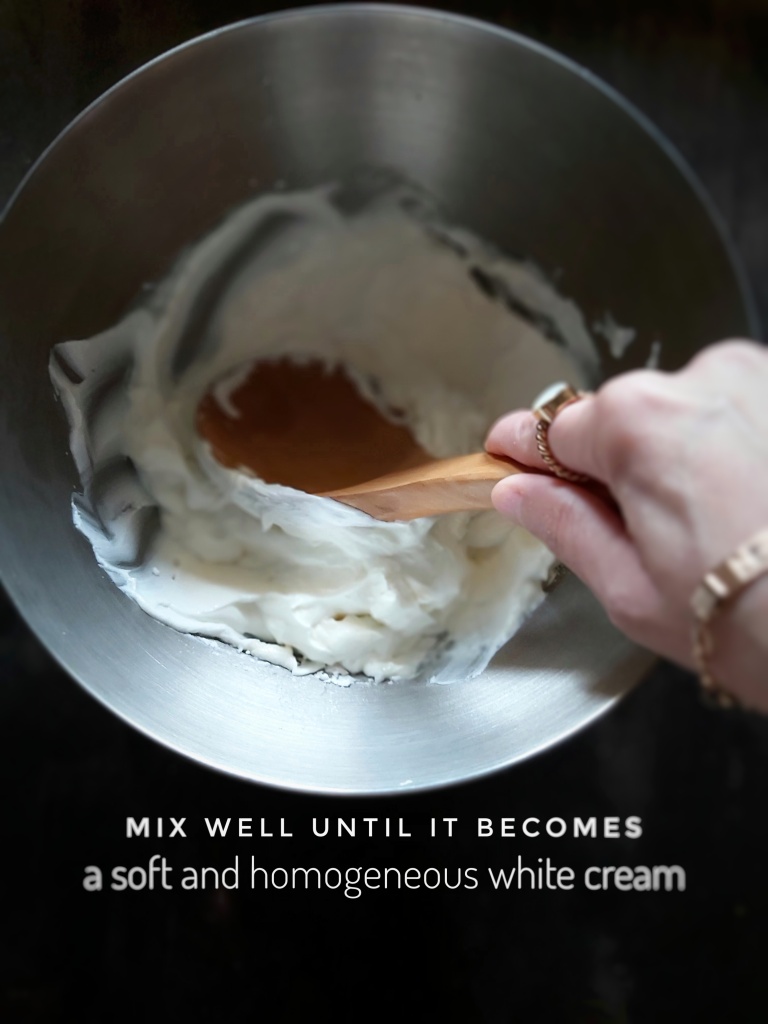
1.In a deep bowl, mix mascarpone, yogurt and 150 grams of icing sugar using a spatula or spoon until it becomes a soft and homogeneous cream. (See step by step photo gallery below)
Cover and leave to cool in the fridge for a couple of hours
2. Cut and remove the top of the panettone.
Cut the remaining cake horizontally into 3 layers
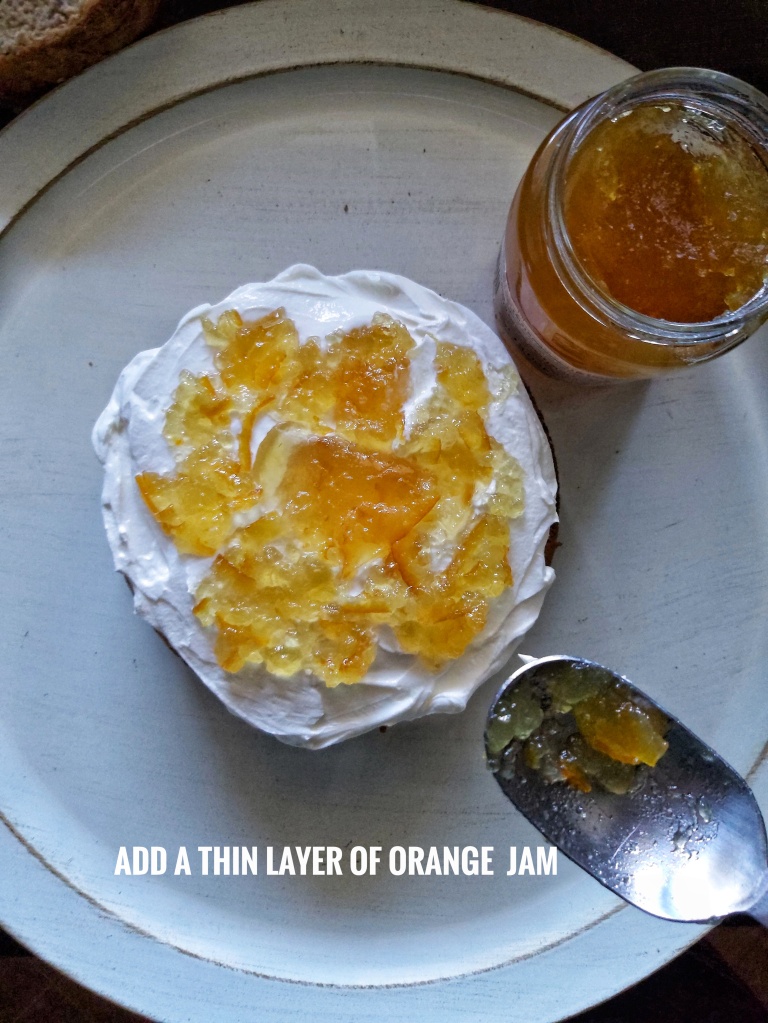
3. Fill the panettone by spreading a layer of cream on the first disc. On top of this add a thin layer of orange marmalade
4. Overlap the second disc of the cake and repeat the same operation
5. Decorate to your liking or leave it as it is.
In this case we decorate with house -shaped cookies (gingerbread), using rosemary branches for the trees and icing sugar for the snow. Simply, quickly, delicious!
If it is not consumed immediately it should be kept in the refrigerator for a couple of days due to the presence of the cheese cream
See step by step the photo gallery bellow.


Christmas Ideas. Part 2. Beef fillet in crust, speck & mushrooms
 Very similar to the previous recipe but with beef fillet, speck and mushrooms.
 Everything is wrapped and cooked inside a "nest" of puff pastry.
 Speck is a type of lightly smoked and aged ham (prosciutto) rubbed/massaged
 with a mix of spices like juniper, bay leaves etc.
 This spiced cure gives speck a deeper taste that's more intense
 than prosciutto crudo.
 It's typically made in South Tyrol and gives a unique flavor especially when paired with
 mushrooms which with their intense aromas makes you feel
a virtual journey into a mountain chalet. Enjoy!


Ingredients : 800 gr fillet of beef , 300 gr mushrooms, 2 carrots, 200 gr thinly sliced speck, 1 rectangular puff pastry, 1 yolk / 2 tbs milk , 50 gr butter, 2 cloves of garlic, oil, salt
Method:
Turn on the oven at 180 ° C / 356 °F
1.Massage the beef fillet with salt. Let it rest for 10 min.
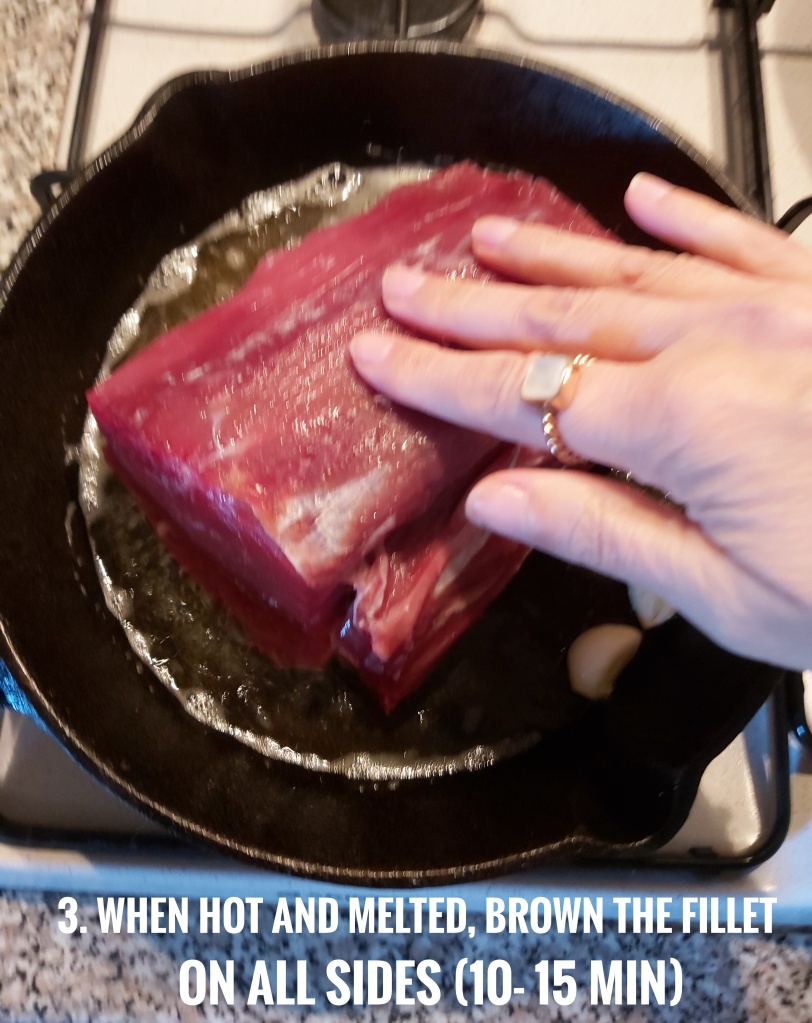
2.In a pan heat 50 g of butter.
3. When it is melted and hot, brown the fillet on all sides for 10 – 15 min
4. Cut the carrot into small pieces. In a large pan heat the oil with the garlic. Add mushrooms and carrot and cook for 15 minutes until they are very dry and withered ( They must not have moisture. Humidity would damage the pastry)
5. Roll out the puff pastry (without removing its baking paper)
6.Cover the pastry with the speck
7.Cover completely with a generous layer of mushrooms
8.Position above the fillet steak
9.Close the dough around the meat by pulling up the baking paper.
10.Make the dough adhere (with your hands and a fork) well.
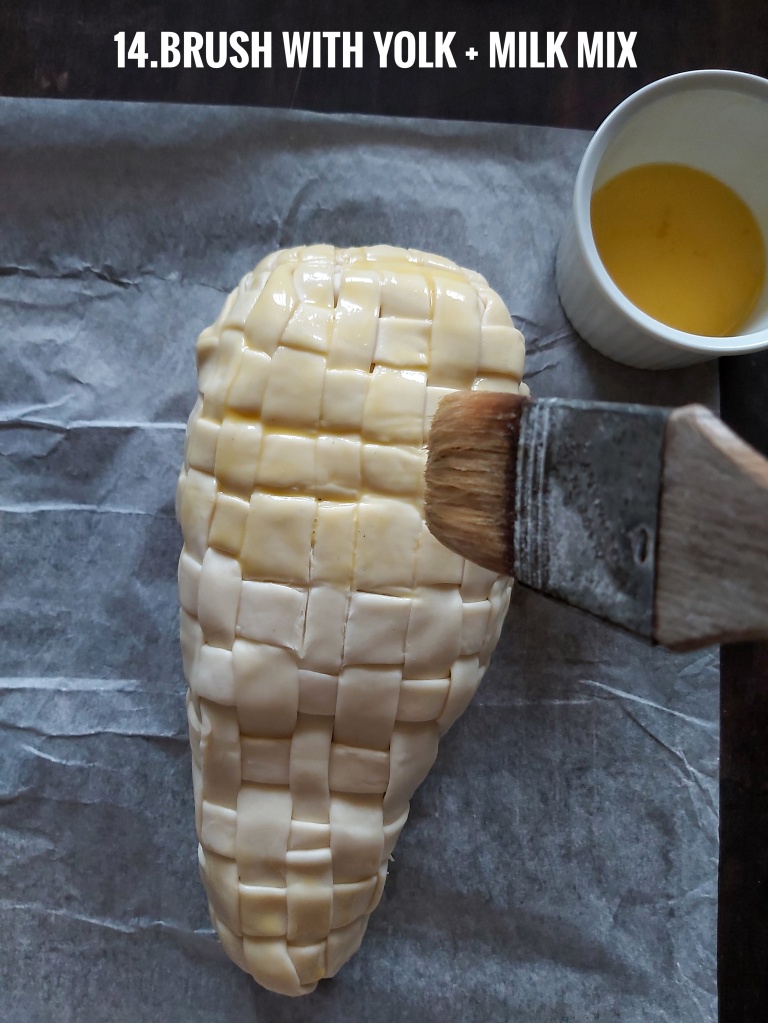
11.Transfer the fillet to the pan, brush with the yolk and milk mix.
12. With a knife cut the surface creating a grid. (Follow the photo gallery)
Bake for 45 min at 180 ° C Remove from the oven, let it rest for 15 – 20 minutes, cut it into slices.
Serve with polenta or mashed potatoes
Polenta: For this recipe has been used “instant” polenta Valsugana typical of northen Italy. Cooking takes only 8 min. As an alternative to polenta, the fillet can be served – and is delicious too – with mashed potatoes.
POLENTA. For 2 persons: 180 gr instant polenta, 900 ml water. Bring the water to boil. Add polenta and a pinch of salt. With a whisk mix costantly to prevent lumps formation. Cook on low heat for 8 min.
Serve hot with a fillet slice on top.


See the step by step gallery below


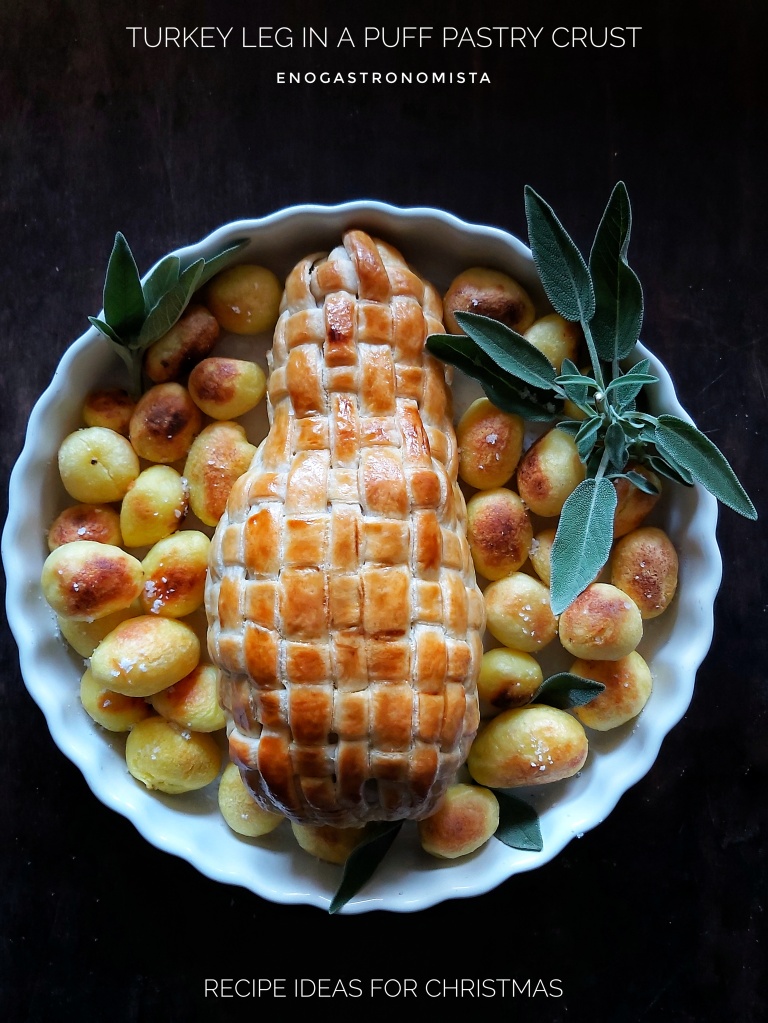
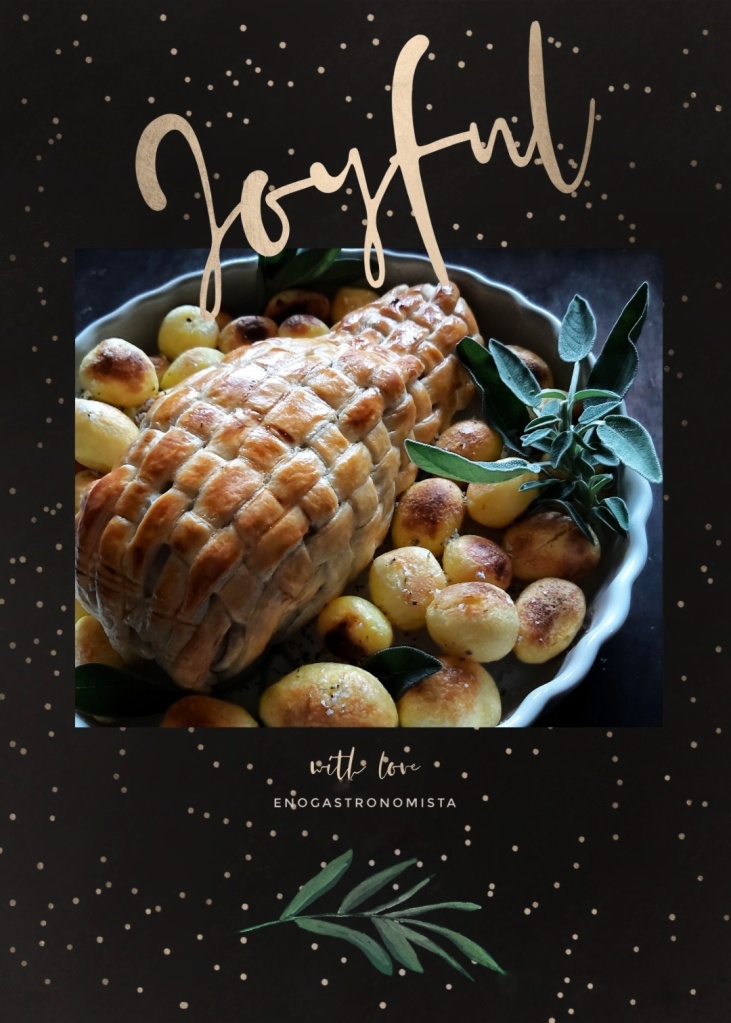
Ideas for Christmas. Part 1. Turkey leg in crust

This crusted turkey recipe also called “Wellington” is the ideal alternative to the usual Christmas roast. The wrapping of puff pastry is usual in Christmas recipes; symbolizes the swaddling clothes of the infant Jesus. In fact, it is very often used to prepare them right in the Christmas period.


Ingredients (for 2 persons):
1 turkey leg ~ boneless~ (800 gr) – 60 ml extra virgin olive oil – 300 ml white wine – 2 cloves of garlic – 2- 3 sage leaves – Salt 2 pinches
2 rolls of puff pastry
1 yolk + 2 tablespoons of milk
Method: Preheat the oven 180°C / 392° F
1. In a pan or in a large pot, heat the oil, add the garlic and the sage leaves.
2. Add the turkey leg. Brown it evenly on both sides for 10 min
3. Add the white wine and the salt.
Cover with a lid. Cook over low heat for 45 min
4. Check the cooking with a long skewer stick. When the turkey is ready, a clear/ transparent and diaphanous liquid will come out. (Pink liquid means it’s still raw in depth)
When it’s ready, remove it from the heat, let it cool completely and dry the meat well with kitchen paper
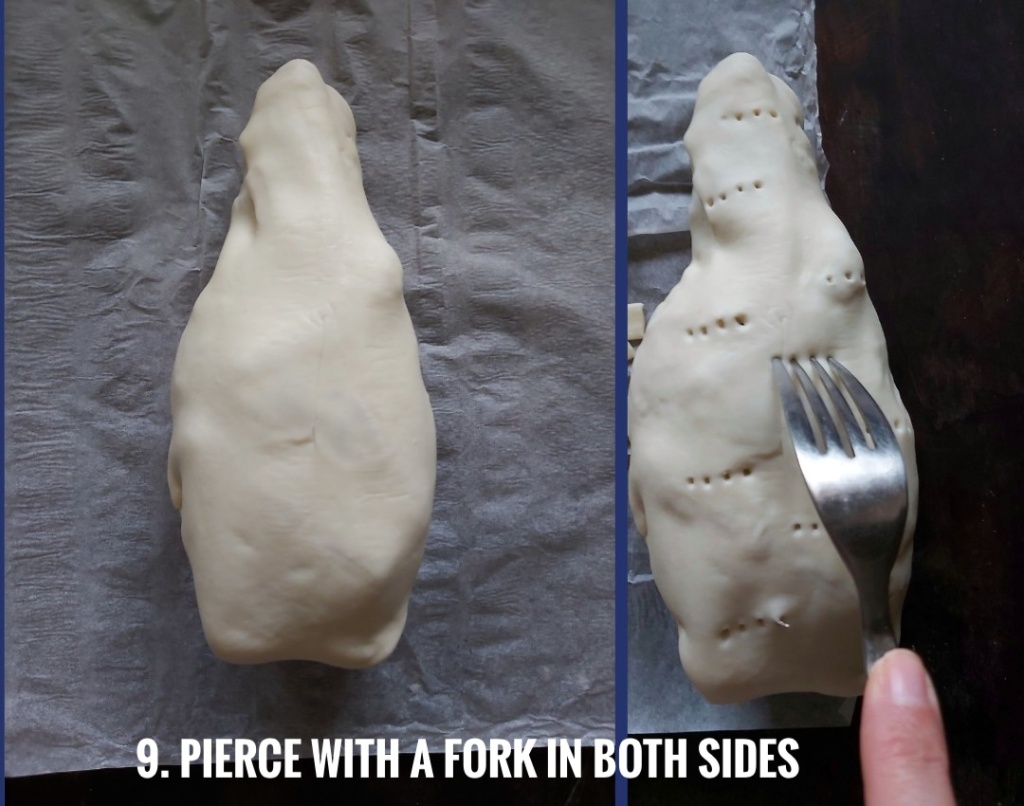
5. Coat the turkey (cold and dried) with the whole pastry
6. Pierce with a fork on both sides to prevent the pastry from swelling during cooking
7. Cut the second sheet into strips and form the classic grid for tarts. (Photo gallery below)
8. Coat the turkey with the pastry grid, sealing the edges tightly at the back side of the leg.
9. Brush the pastry with 1 beaten egg yolk together with 2 tablespoons of milk 10.
Bake in a preheated oven at 200 ° C for 20 – 25 min until the pastry is golden. Serve with roasted baby potatoes.
Recommended wine: In general, a medium-bodied red wine is the pergect choice, especially if you space between Barbera and Merlot, two different worlds but both perfectly matched to baked turkey.


History & nowadays tradition of Greek Cheeses


The science of transforming milk into a solid substance is a very ancient procedure since the time of ancient Greece.
Homer (Όμηρος) in the Odyssey 6th century BC describes in detail the shepherd and cheesemaker Cyclop Polyphemus and gives descriptions of the cheeses that matured in his cave and were made from sheep’s, goat’s milk & sea salt
What we now call ” FETA ” was known to the ancient Greeks, since its preparation is mentioned many times in the Odyssey .
Polyphemus at first transferred the milk, he collected from his flock to “bags” made of animal skins, finding – to his great surprise – that after a few days the milk turned into a solid, acidic and preservable mass. After this discovery he experimented with various combinations, each time having different types of cheeses.
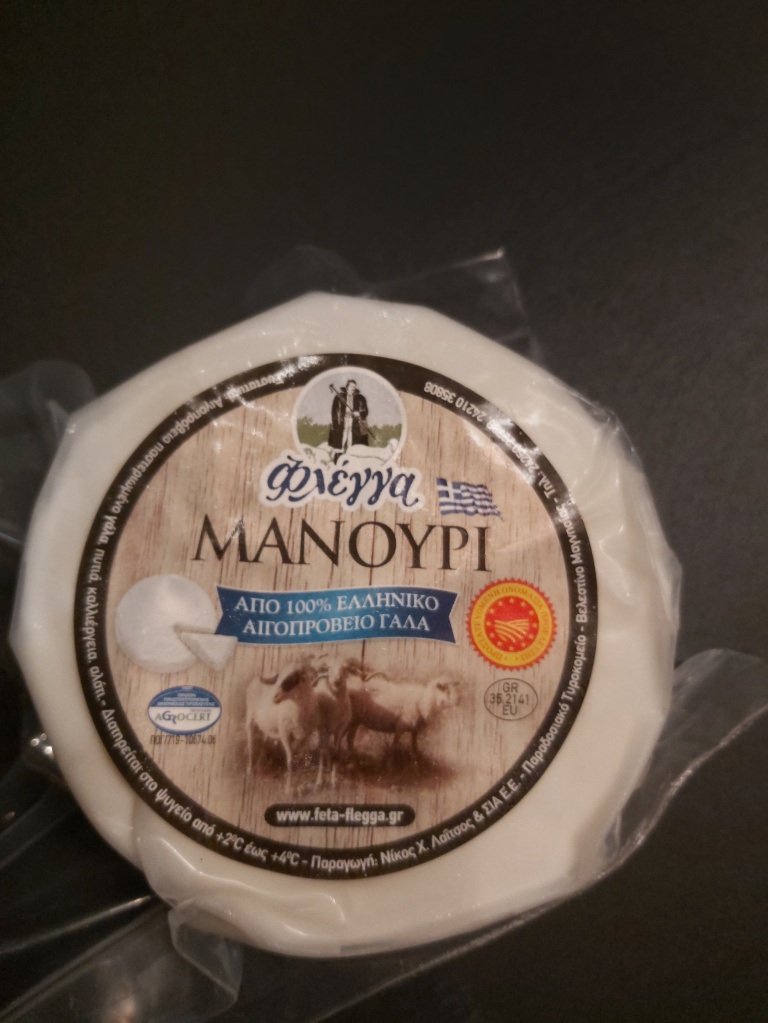
Still others are soft and less salty such as odiern “Anthotiro” and “Manouri” and were kept in its cave in straw baskets.
Anthotyro (Aνθότυρο): white cheese produced from sheep’s and goat’s milk. Its name means the flower of the cheese, a name that justifies its name as it conveys strong
smells of freshness
Myzithra (Μυζήθρα) is a fresh cheese made with milk and whey from sheep or goats, or both. The cheese is soft, snow-white, creamy, and moist. Since no salt is added to mizithra it has an almost sweet and milky taste and may be eaten or, often, baked in pies.
Manouri (Μανούρι): a type of myzithra type cheese, which is rich in fat. It comes from the ancient adjective manos (cheese), meaning sparse, soft cheese
It is distinguished due to its sweet and mild taste and aroma, having been characterized by the National Dairy Committee of Greece as “the most exceptional traditional Greek whey cheese
Xinotyri (Ξινοτύρι): The roots of this traditional cheese are lost in time. It is a spreadable cheese that is produced by mixing sheep’s and goat’s milk, and has a pleasant, slightly sour taste

Feta ( Φέτα): the first reference to feta is made in a Byzantine poem where it is referred to as ” πρόσφατος” “recent”. This is considered to be its Byzantine name. The name feta dates from the time of Venetian rule in Greece, in the 17th century, and derives its etymological origin from the Latin word “fette”. Probably the word refers to the practice of cutting the cheese into slices to be inserted into the barrels
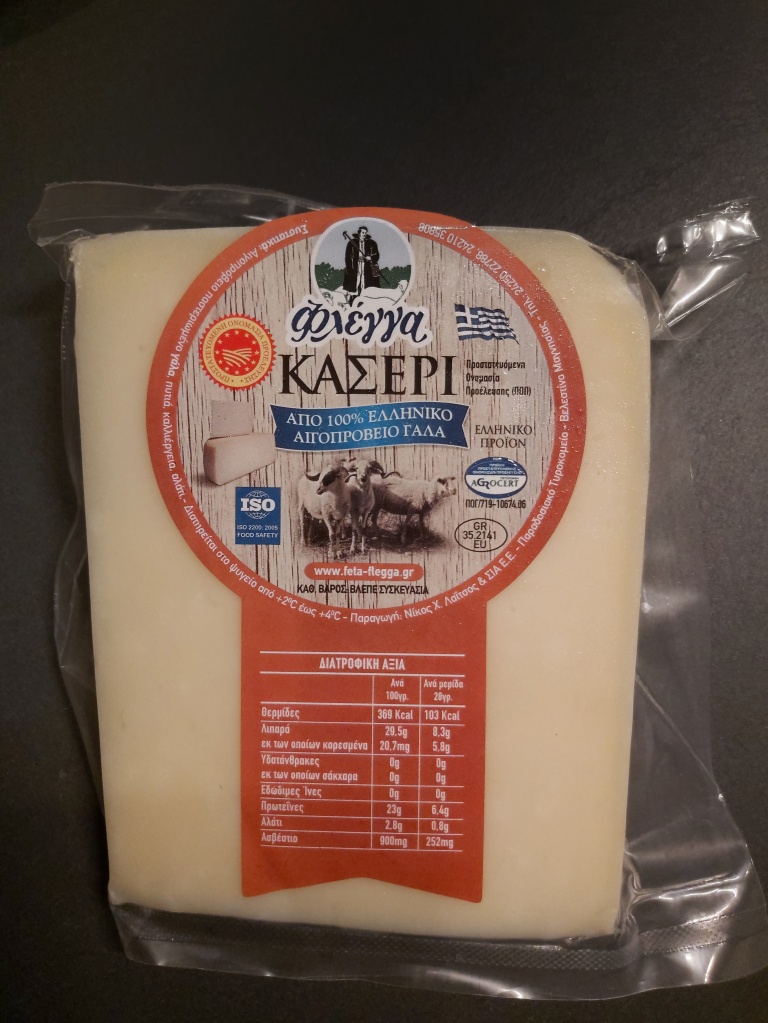
Kaseri ( Κασέρι): cheese-making became quite popular during the Turkish occupation in Greece (15century) , due to the lack of plenty of meat. Then, we came up with the name of a well-known type of cheese, kaseri; it seems to come from the Turkish word kaşer, which in turn comes from the Latin caseus = cheese. From the same root comes the cheese in English and the “käse” in German

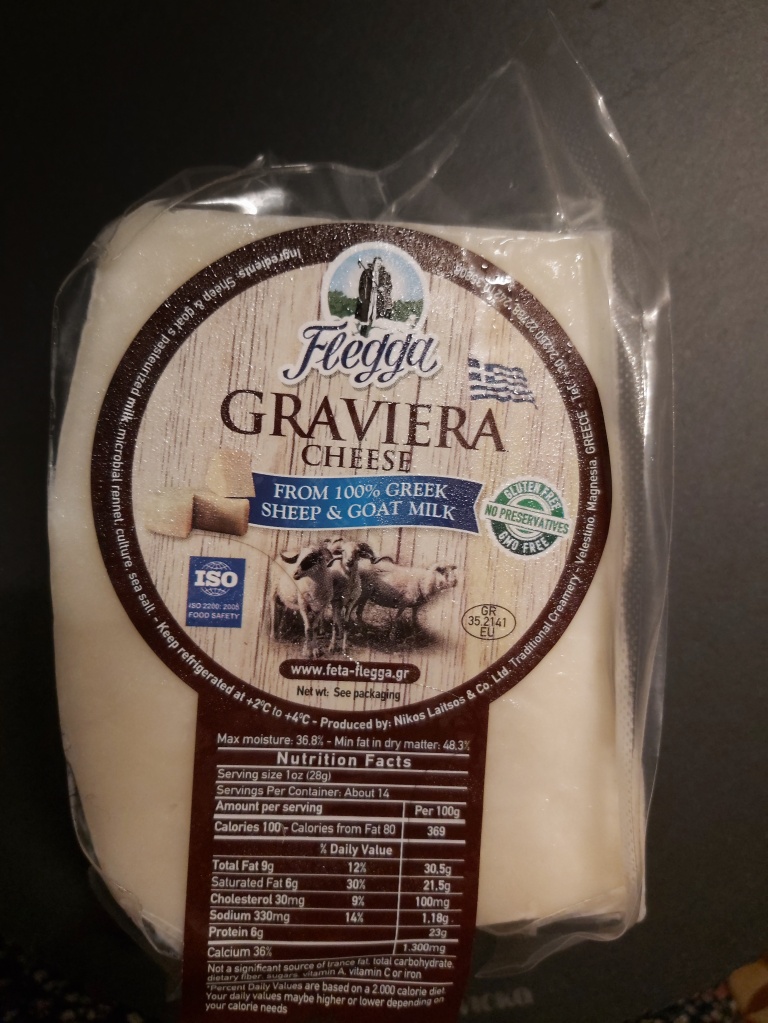
Graviera (Γραβιέρα): is a hard cheese, made mainly from sheep’s and goat’s milk.
It is one of the best known Greek cheeses after feta and has been produced for centuries with the traditional method. The cheese is round in shape and has a compact and elastic mass of light yellow color. Its complete maturation time is at least three months
Graviera cheese received a certification of protected destination of origin (a PDO) in 1996. In other words, cheeses that are called Graviera but made in countries other than some regions of Greece are not the real deal and have no right to use the name.
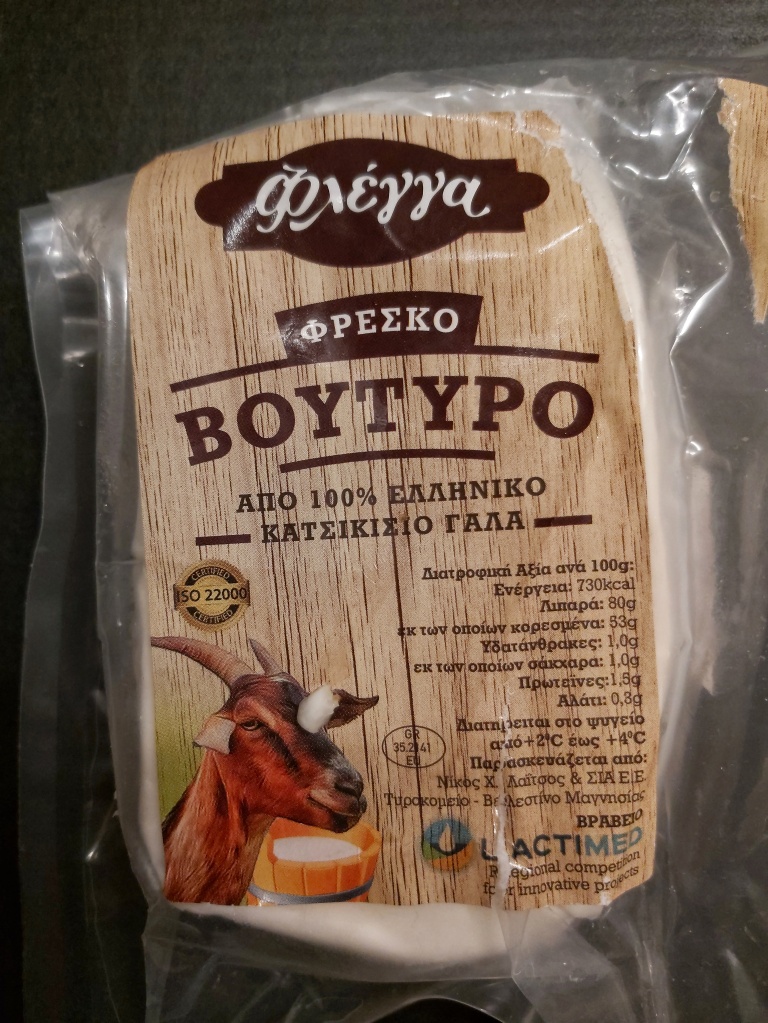
Below we present some of these ancient cheeses, produced by the Greek award-winning “Flegga” dairy company.

Since 1957 all these traditional products are made from 100% organic goat and sheep milk, no GMO, no gluten, no chemicals, no preservatives and yes to ISO food safety. ( The standard ISO 22000 is based on the HACCP principles defined by the Codex Alimentarius)


We will never be tired of repeating the benefits of goat and sheep milk against cow’s milk.
As opposed to cow’s milk which contains the allergenic protein “A1 casein” (a highly inflammatory protein for the human body), goat’s milk contains A2 casein, that makes it – protein wise – the closest milk to human breast milk, hypoallergenic and tolerated even by babies
So for this Christmas, in the coming days we will propose some ideas using these precious products in a simple, easy and genuine way.


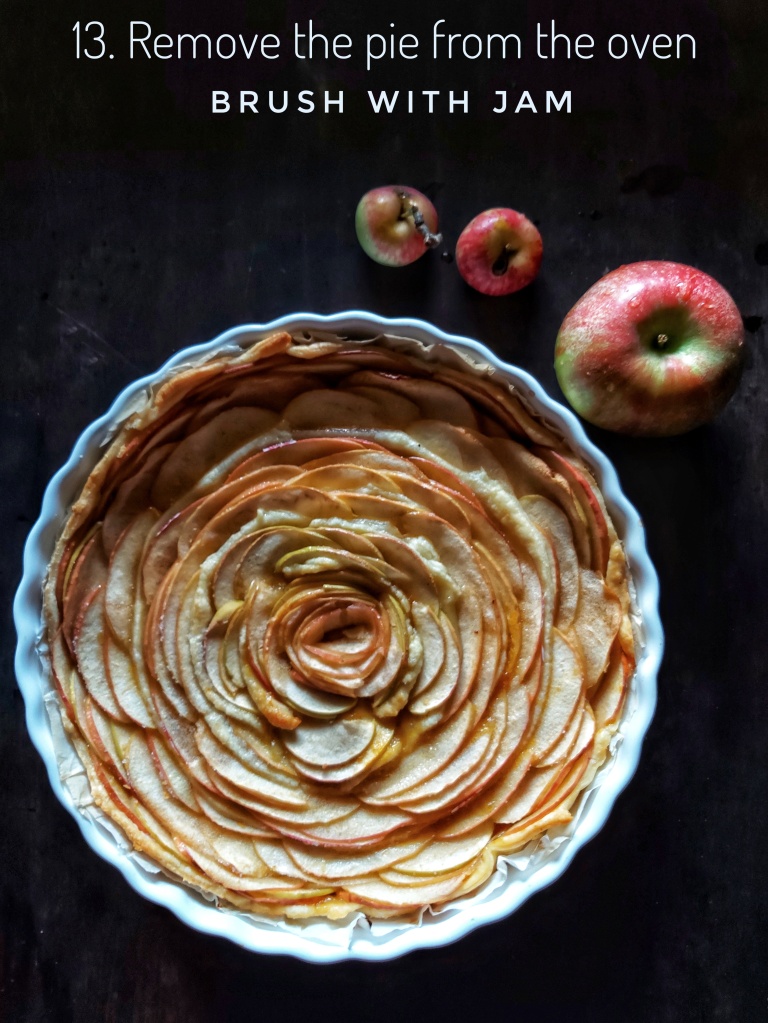
Apple rose tart
A typical autumn pie made of apple “petals” (very thin slices) placed in such a way as to resemble a rose . To be consumed hot or cold and accompanied with an apple & cinnamon-based herbal tea or a ball of vanilla ice cream.


Ingredients: Apricot jam 350 gr
2 rolls of puff pastry
3 apples
30g sugar / icing sugar/ ground cinnamon
Method:
1. Cover a pie pan with a sheet of puff pastry, gently pressing it to the edges.Trim the excess pastry off with a knife
2. Cut 3 apples in half, remove the core and cut into thin slices
3. Pour the apricot jam onto the puff pastry to form an even layer
4. Cut the second sheet of puff pastry into 2-3cm circular strips
5. Arrange the thinly cut apple slices around the outer edges of the pie.
6. Alternate the apple slices with strips of puff pastry. Roll the final apple slices into a little ‘rose’ and place in the middle of the pie.
7. Sprinkle with sugar and bake at 200°C /392°F for 30 minutes.
8. Remove the pie from the oven, brush with a little apricot jam and dust with icing sugar and ground cinnamon
Serve with a herbal tea made of boiling water, apple peel and cinnamon stick


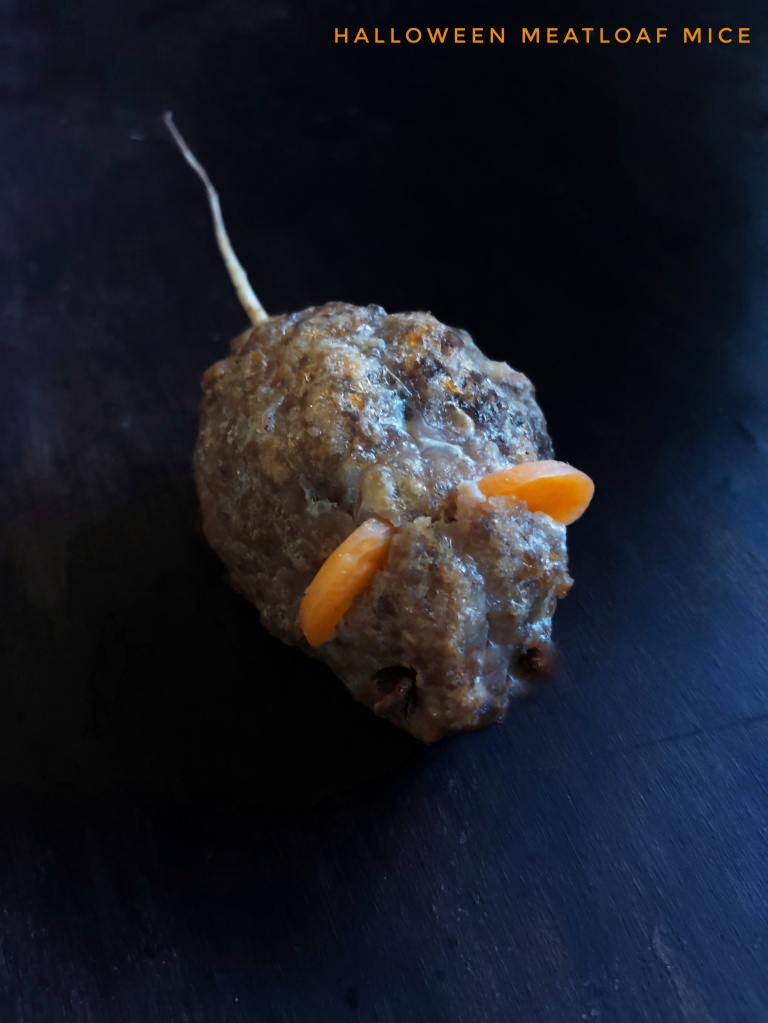
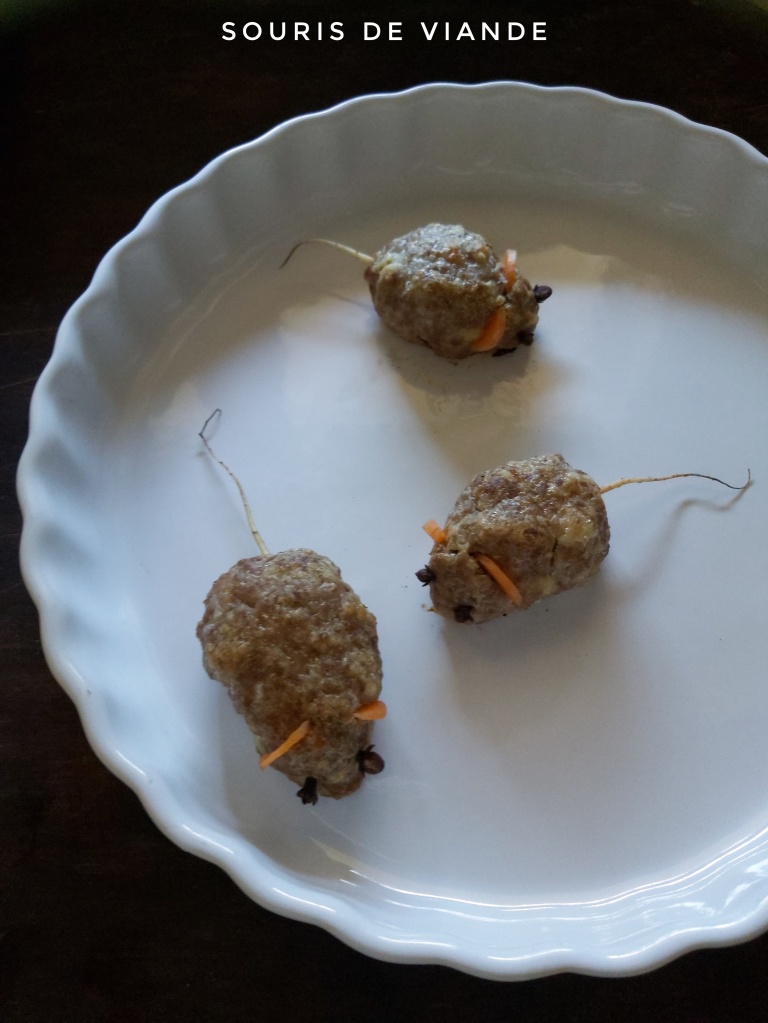
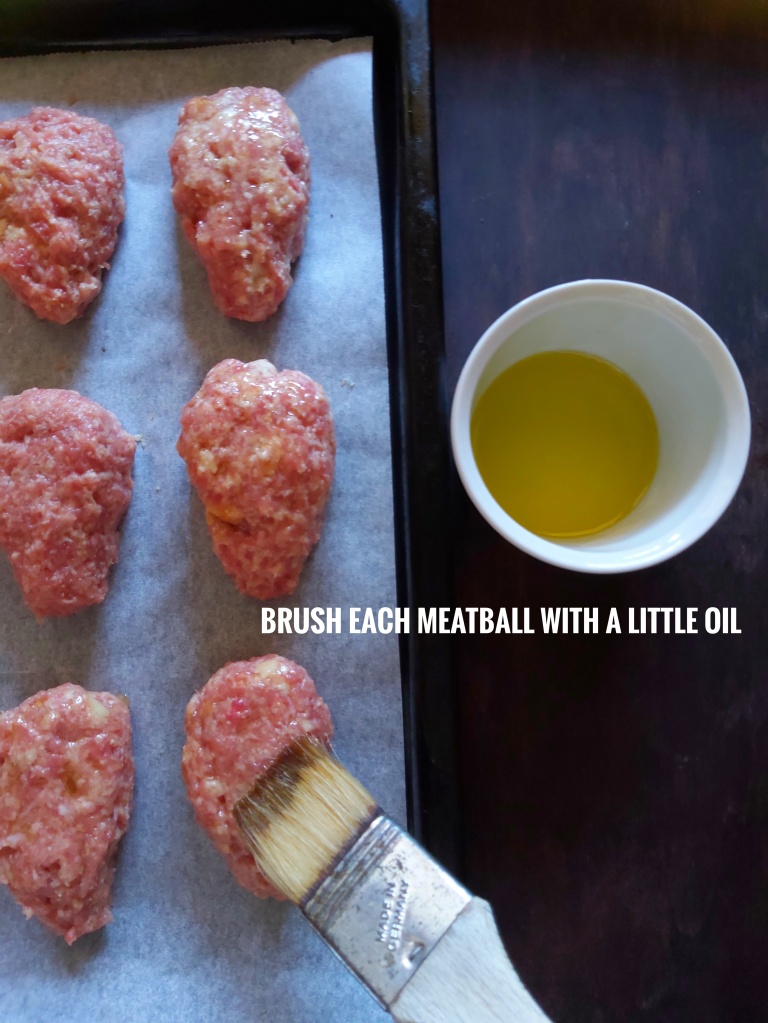
Halloween meatball mouse

One of the classic Halloween dishes.
The classic meatballs but in the shape of a mouse.
Horrible but tasty and fun if you have little guests for dinner.

Served on a plate of spaghetti with a few sketches of ketcup to imitate blood and the party will be immediately lucubrious.


Ingredients:
1/2 kg ground beef
300 gr bread for toast
200ml milk
1 egg
Salt
1 Carrot
Cloves
Method:
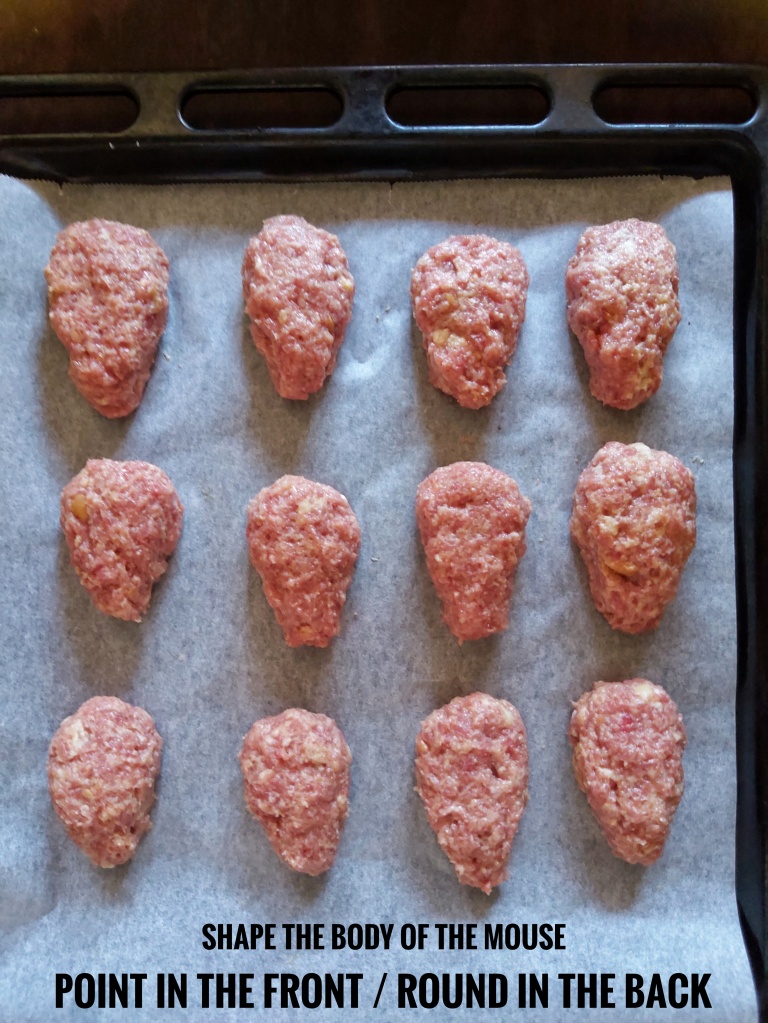
Put the bread in the milk for few seconds until it’ s well wet. Squeeze it, add it in a bowl. Add the ground beef, the egg and a pinch of salt.
With your hands knead everything until it is homogeneous.
Form the mouse body as seen in the photo gallery below. Brush each meatball with a little olive oil.
Bake for about 30 – 35 min ( 180°C / 350°F)
Remove from the oven. When they are warm, press the cloves in to the pointy end to make the eyes, carrots half slices to make ears. For the tail you can use the final filament of carrots or thin stalks of carrots, parsley etc
Serve with spaghetti and cheeses


Untilted

Dear Karen, first of all I would like to thank you for making me laugh, think and reflect about people and the variety of life difficulties.
In this moment, in this state of emergency, people of all ages die like ants, i admit that personally think often, very often of all the sick people out there, the elderly alone, parents without work and money, people with recent mourning, kids without parents, mothers who have to be mum and father together … In this scenario I discover – thanks to you – that there are a lot of problems more serious out there: Your unwanted followers .
But we will solve everything, don’t worry.
For this reason I feel obligated to clarify some points with you and for you Karen…Since you open a thematic blog and launch it on this vast network called “internet”, immediately every single article of yours, every single word, commas included, your face photos included; is “connected”, “linked”, “interconnected”, “shared” with billions of personal computers. That what means Karen? Means that people of all colours, of all ethinicities, people that are different of you, people with different interests or hobbies of you; writers, doctors, tailors, hairdressers, politicians, terrorists, pedophiles, murderers, policemens, students, bloggers, farmers etc CAN SEE IT, can read it, can comment it, can follow it. Unfortunately for you, food bloggers can visit it too. I’m sorry to give you this really bad news about food blogs. I know you don’t appreciate that we follow you.
It is as if a writer was standing outside the bookshop selling his book and selecting who will read it and who not. You doing this Karen. You stay on your blog and select who will read it and who will not. Then you use their contacts to send the mail above.
However, YOU and only YOU Karen, allow everyone to visit your pages. If you don’t like this, there are tools offered by WordPress that block visits from blogs or countries you don’t want to be visited. In this case you can “close”, you can “block” the visits from Italy where I live. And I would be grateful to you and to God if you did it immediately …. But I would like to inform you that there are many many many chances, bilion of chances that other food bloggers or blogs different from yours, can follow you: Nightmare without end… It will be hard for you to send tones of mails to those all who do not want to follow your precious and very useful blog. Let me tell you that is not even kind too. Maybe you started a blog from wrong. maybe you wanted a closed facebook group with people of your same interests. it’s your right, i’ am with you. But here is not facebook. And i’ am sure you know that very well.
I have tried to explain it to you in easy words. Now I invite you to clarify what a food blog is – as a first step. They are humans too Karen. May be they have kids who may be like your blog. May be they are people who simply love and appreciate a lot your crafts. Start from here. Think. For some reason God give us the thought. I will be happy to help you on your difficult path. You know my mail. Feel free to contact me again. Stay healthy, have a joyful life and serenity in your soul. Be kind. All the best. Xristina
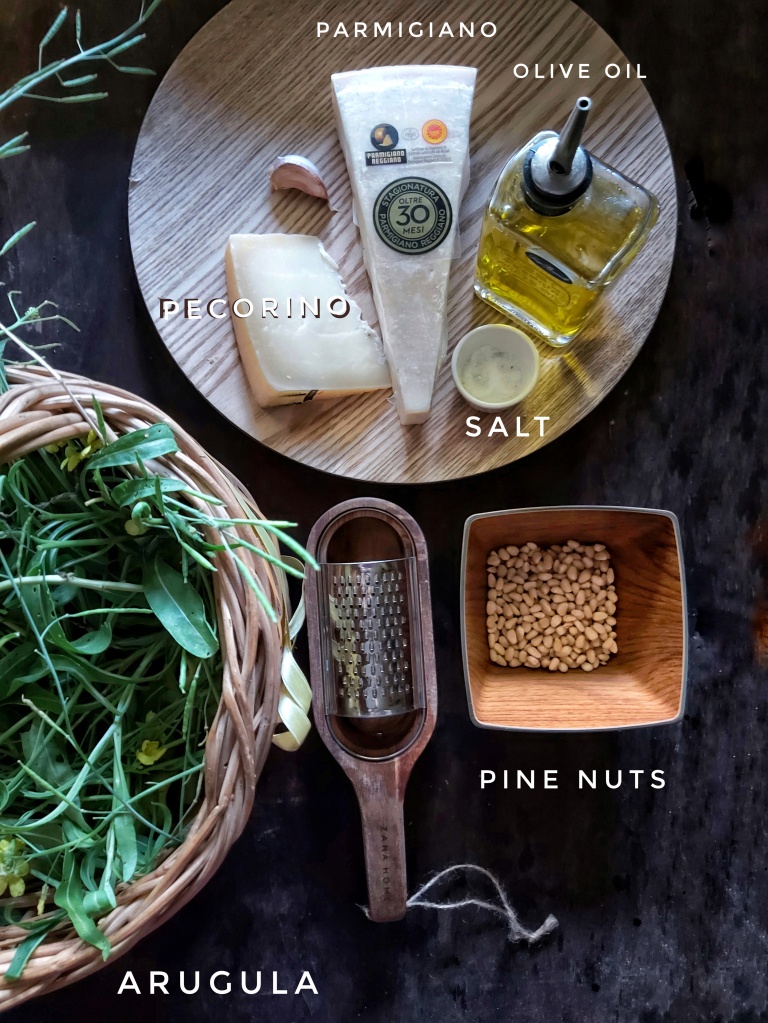
Arugula pesto

Arugula or rocket pesto is a classic cream / sauce of Italian cuisine. it is used to season pasta or on slices of toasted bread (bruschetta).
It is the variant of basil pesto. Its flavor depends a lot on the arugula used, for example wild arugula has a stronger flavor than cultivated. For this recipe has been used half selvatic and half cultivated. Rocket pesto is prepared by combining a few healthy ingredients, which go well with the intense flavor of this herb, such as extra virgin olive oil, garlic, parmesan cheese, pecorino and pine nuts. The latter can be replaced with other valid alternatives, such as walnuts, almonds or pistachios. In any case, it is a condiment that represents a real detoxifying product


Ingredients:
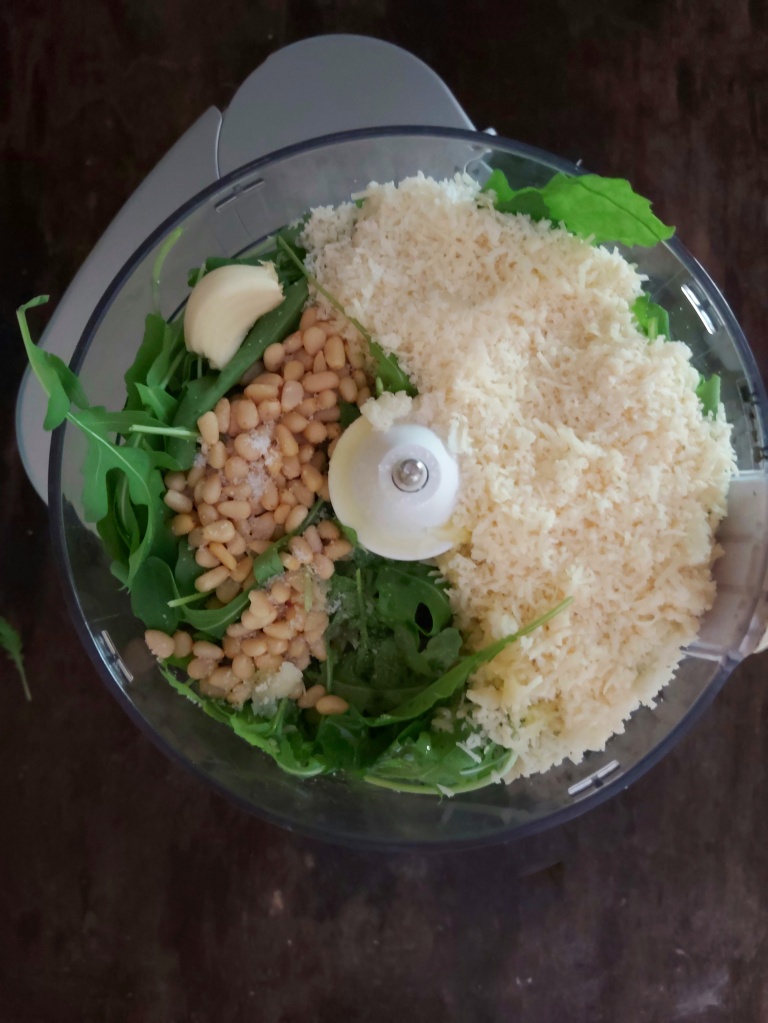
150 gr arugula – 100 gr parmigiano or grana – 50 gr pecorino cheese – 100 gr pine nuts – 200gr extra virgin olive oil – 1 garlic clove
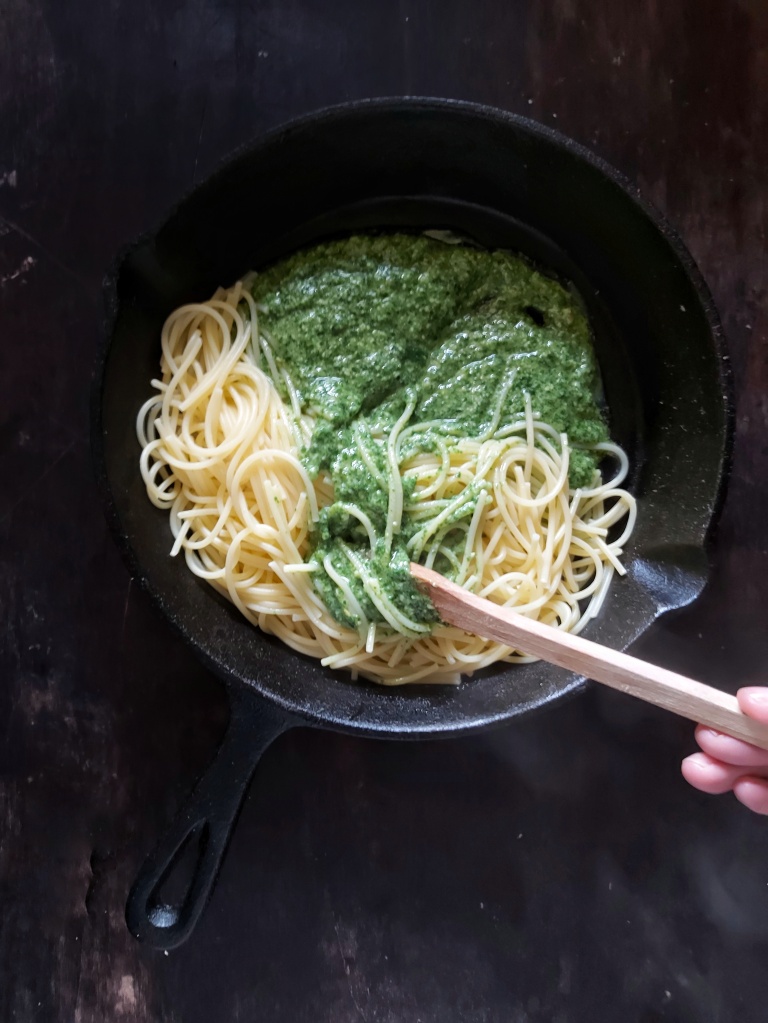
Method: Combine all ingredients in a food processor and pulse until creamy and homogeneous.
Cook spaghetti al dente (i use Barilla gluten free) . Drain them. Heat the pesto in a pan for 1 – 2 minutes. In the same pan add the spaghetti and mix well with the pesto. Serve immediately with a fresh dry white wine such as Fiano d’ Avellino or a Greek Kallisti Reserve’ from Santorini, fermented in oak barrel.
STORAGE
The arugula pesto can be kept for 2-3 days in the refrigerator, in a hermetically sealed jar well covered with a layer of oil.

Alternatively,it can be frozen in small jars and then defrosted in the refrigerator or at room temperature.


Kefir Flegga & Aloe Vera smoothie

As opposed to cow’s milk which contains the allergenic protein “A1 casein” (a highly inflammatory protein for the human body), goat’s milk contains A2 casein, that makes it – protein wise – the closest milk to human breast milk, hypoallergenic and tolerated even by babies
Therefore it is always preferable to consume goat milk and goat dairy products, especially when they come from free animals who grazing on grass
So, always using our favorite 100% organic brand of dairy products, the award-winning and prestigious Greek Creamery “Flegga”. Today’s smoothie includes goat’s bio kefir with the addition of aloe vera, green grapes, green apple and spinach. Just add all ingredients into a blender (after freezing the grapes) and mix until velvety and creamy.
Aloe vera contains 75 potentially active constituents: vitamins, enzymes, minerals, sugars, lignin, saponins, salicylic acids and amino acids.
Green grapes , spinach & green apples are rich of vit A, B2, B6, E, C and K, potassium, iron, calcium, magnesium, copper, manganese, zinc, phosphorus.
References
- Food is Medicine – “Goat Milk Benefits are Superior to Cow Milk”. Written by Dr Josh Axe on May 20, 2015
http://www.draxe.com/goat-milk - Benefits and medical uses of Aloe https://www.medicalnewstoday.com/articles/265800
“Let food be thy medicine, thy medicine shall be thy food”
«ΦΑΡΜΑΚΟ ΑΣ ΓΙΝΕΙ Η ΤΡΟΦΗ ΣΑΣ ΚΑΙ Η ΤΡΟΦΗ ΣΑΣ ΑΣ ΓΙΝΕΙ ΦΑΡΜΑΚΟ ΣΑΣ»
Hippocrates (4° Century BC)


Ingredients for 1 person: 1/2cup organic goat kefir by Flegga
150 gr aloe Vera
10- 15 frozen green grapes without seeds
1/2 green apple
Spinach leaves about 20 leaves
Agave or marple syrup 2 tbs
Method: Wash and freeze the grapes, simply by placing them in a plastic container.
The next day, wash the spinach leaves and cut the apple into small pieces. Do not peel it.
Cut a piece of aloe, more or less than 20cm.
Cut out the green peel and remove the gel with the help of a spoon.
Add all ingredients into the blender, frozen grapes, apple, spinach, aloe gel, kefir, agave or maple syrup.
Blend few minutes until velvety and creamy. Serve immediately


Ariani Flegga smoothie
Preparing a smoothie with Ariani by Flegga is the most delicious way to refresh yourself with taste while staying in health.
Ariani by Flegga is a Greek traditional product made by 100% fresh bio and pasteurized goat milk with the addition of bio yogurt culture. No preserventives. Only organic milk produced esclusively by ruminants goats in the valleys of Pindos mountain range.
Ideal for toddlers, kids, adults, the right choice for breakfast, recipes, drinks, ice creams, smoothies. Unlimited the ways you can enjoy Ariani. Unique its flavor as it is. But here some ideas for a refresing and pleasant smoothies with the addition of vegetables, fruits, almonds and everything else your fantasy commands.


Ingredients for 2 persons:
1/2 avocado
1 cucumber (with the green peel)
1/2 green apple
1/2 glass of Ariani Flegga
5 – 6 ice cubes
Method:
Cut all fruits and cucumber in small pieces. Add them in a blender with the rest of the ingrediends, so add Ariani and ice cubes. Blend 2 min until the smoothie is homogeneous.
If it is very dense, add more Ariani and ice cubes. Blend again for few seconds until you have the desired consistency. Serve cold.
For the sweet version, simply add 1 tbsp of honey, 5 – 6 almonds/person. Blend until everything is smooth and creamy.
To see the procedure step by step, click the photo gallery below. (Java script is required)

Chicken legs with Barbera grapes
Not as unusual as this recipe may seem. meat and grapes perfectly bind together. For this recipe, the grape used is Barbera. Barbera is an ancient Italian grape dated back to 17th century; naturally high in acidity with strong black cherry flavors. For its acidity, the flavor must be balanced with a little honey and sweet wine or liqueur during cooking. Obviously you can replace Barbera with any other type of grapes. If your grapes are sweet, simply remove the honey from the ingredients.


Ingredients for 2 persons:
4 chicken legs
800 gr Barbera grapes (oviously you can choose any other type of grapes. If your grapes are very sweet, remove the honey from the ingredients) Barbera grapes is an ancient Italian grape dated back to 17th century; naturally high in acidity with strong black cherry flavors
Fresh thyme – Fresh sage – salt – pomegranate seeds
Half glass pomegranate liqueur (or alternatively half a glass of red sweet wine)
1 tbsp honey
4 tbsp olive oil
1 teaspoon corn flour
Method:
Preheat oven 200°C / 392°F
1.Heat 4 tbsp oil in a non stick pan. Add the chicken legs and cook until browned all around. Add the salt.
2. Add the grapes to the skillet, the herbs, the pomegranate liqueur (or alternatively half a glass of red sweet wine) and 1 tbsp of honey over the grapes.
3. Bake in the preheated oven for 50 min.
4. When ready transfer the chicken to plates. Filter the liquid from the pan, add 1 teaspoon of corn flour and boil (in a small saucepan) for 1-2 min until it becomes a creamy and glossy sauce. Pour on the chicken legs. Decorate with fresh herbs and pomegranate seeds.
Serve with fresh Barbera wine


See step by step the gallery below
Karidopita / Καρυδοπιτα
Karidopita. A mouthwatering , dark, spice scented walnut pie. Widespread throughout Greece, it is one of the oldest and most traditional Greek desserts. Scented with cinnamon and gloves, almost always served with a ball of ice cream, it has a flavor that is not easily forgotten.
The recipe varies slightly from one region to another, so it can be found with some small variations such as adding rum or cognac in the dough.


Ingredients
For the syrup
- 800 g granulated sugar
- 800 g water
- 1 stick cinnamon
For the walnut pie
- 250 g butter, at room temperature
- 200 g granulated sugar
- 2 teaspoon vanilla extract
- 360 g hard flour
- 4 eggs
- 250 g walnuts
- 1/2 teaspoons cloves
- 1 tablespoon cinnamon
- 1 tablespoon baking powder
- 1 pinch salt
- 120 g milk
- Butter, for the pan
- All-purpose flour, for the pan
Method:
Syrup:
- In a pot add the sugar, the water and the cinnamon and cloves
- Transfer over medium heat and let it come to a boil until the sugar melts.
- Remove and set aside to cool well.
For the walnut cake
- Preheat the oven to 170ο C (340ο F) set to fan.
- In a mixer’s bowl add the butter, the sugar, the vanilla, and beat with the whisk attachment at high speed, for 3-4 minutes, until the mixture is fluffy.
- Add 2 tablespoons of the flour, the eggs one by one, the milk and keep beating. Wait for each egg to be incorporated before adding the next.
- In a blender add the walnuts, the cloves, the cinnamon, and beat so that the walnuts have the desired size and consistency that you want in your cake.
- Transfer the walnuts to a bowl and add the flour, the baking powder, and the salt.
- In the same mixer’s bowl add the solid ingredients and mix all ingredients together with a spoon or a spatula.
- Butter and flour a 25×32 cm baking pan and spread your mixture in it. Bake for 40-50 minutes or until a toothpick comes out clean from center of cake
- Remove and immediately pour the cold syrup over it, using a serving spoon.
- Allow 1 hour for the whole syrup to be absorbed, and serve with vanilla ice cream.
(Do not refrigerate, it may cause the syrup to crystalize.)

Whole wheat flour decorated bread ( Two engraving patterns)
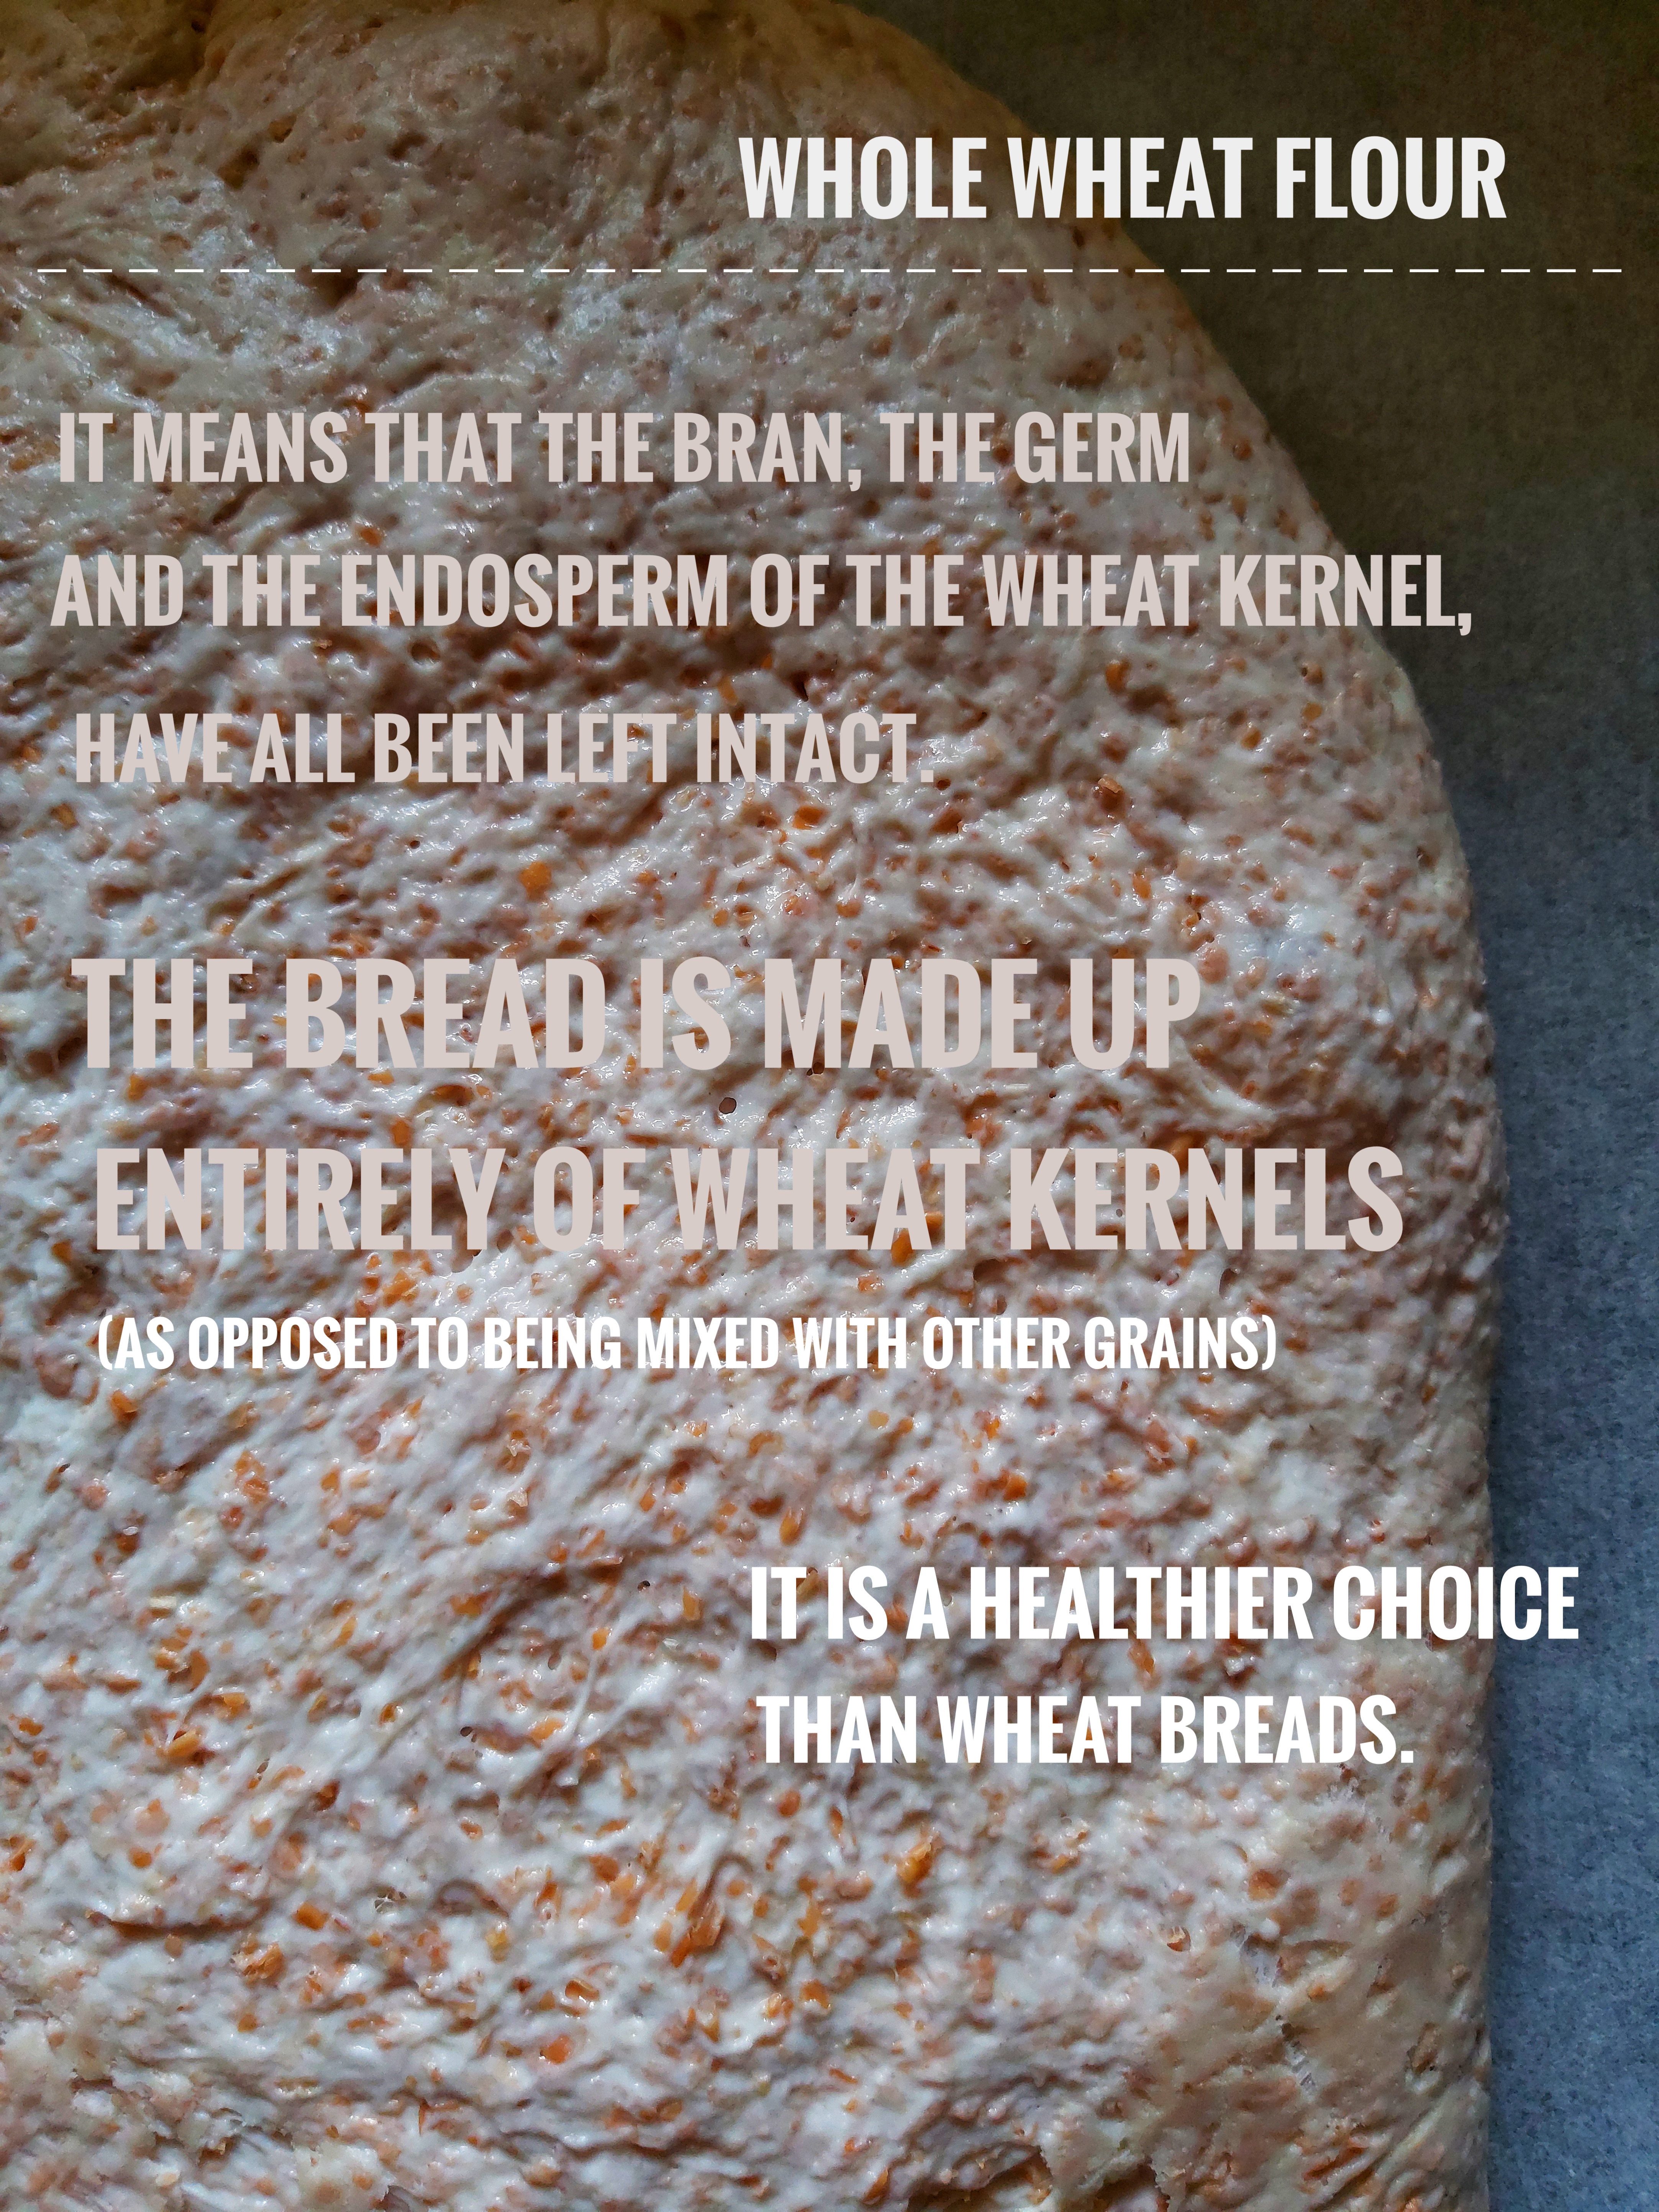
Same recipe as “Decorated bread” but this time made with whole wheat flour. Which means stronger aroma, stronger flavor, darker crust color and obviously more nutrients than regular white bread. This because whole wheat flour contains approximately the same relative proportion of nutrients and components as the original wheat kernel.
As for the white bread, the same rule for incisions also applies here. So first cover the loaf with a thin layer of white flour. Dusting the top of your loaves with flour prior to scoring will ensure maximum contrast between white flour and dark baked crust.


Ingredients:
Ingredients for 1 loave
- 600 g whole-wheat flour, graham flour
- 2 teaspoons yeast
- 1/2 teaspoon salt
- 1 tablespoon honey or sugar
- 2 tablespoons olive oil
- 400 g water, lukewarm
Method:
- In a large bowl, add the flour, salt, yeast and honey or sugar
- Slowly add the water and start kneading with your hands continuously, until a smooth, elastic dough has formed.
- Then add the olive oil. Knead again until all of the ingredients are completely incorporated into the dough.
- Cover the bowl with a towel and allow dough to rest for 1 hour, until it rises.
- Preheat oven to 180° C (356° F)
- Transfer dough to a working surface dusted with flour. Knead dough and shape into a loave. Line a baking pan with parchment paper. Place loave in baking pan. Cover with a towel and set aside in a warm area, until they double in size.
- You can dust the parchment paper with some flour before placing the loave on it.
- Before baking, sprinkle and brush the loaves with white flour
- Engrave the shapes of your choice (leaves, lines, geometrical shapes etc) with a simply sharp razor. See the gallery bellow for two different inspirational patterns.
- Bake for 50 min until golden brown and the loaf sounds hollow when tapped underneath. Cool on a wire rack.
- When ready, remove from baking pan and set on a wire rack to cool completely.


Greek Easter Bread / Lambròpsomo/ Λαμπρòψωμο

Lambròpsomo is a bread from the Byzantine times that continues to exist to the present days throughout Greece as a traditional Easter bread. It is used to package it in various forms on Holy Thursday. The shape of each bread varies according to local traditions. The best known and the most used shape is the braid, on which a red egg can be placed. The braids and knots on the bread, derive from pagan times as a symbol of the removal of evil spirits.
<Warmest thoughts, deep affection to all people who suffer from pain, fear, loneliness, emptiness. No words enough. Blessed Orthodox Easter>
![20200415_175847-01-01-01[1]](https://enogastronomista.files.wordpress.com/2020/04/20200415_175847-01-01-011.jpeg)
![20200415_180017-01[1]](https://enogastronomista.files.wordpress.com/2020/04/20200415_180017-011.jpeg)
![20200415_180131-01-01-01[1]](https://enogastronomista.files.wordpress.com/2020/04/20200415_180131-01-01-011.jpeg)
Ingredients:
- 250 g water lukewarm
- 8 g yeast
- 50 g granulated sugar
- 20 g olive oil
- 500 g hard flour
- 1 teaspoon salt
- 1 egg yolk, diluted with 1 tablespoon water or milk
- 30 g sesame seeds
Method:
- In a mixer’s bowl add the water, the yeast, the sugar, and mix with a hand whisk until the sugar and the yeast are dissolved.
- Add the olive oil, the flour, the salt, and beat with the hook attachment at medium-high speed, for 3-4 minutes, until there is an elastic dough.
- Transfer the dough to a floured bowl, sprinkle a little flour on top, cover with plastic wrap and set aside for 1 hour to double in volume.
- Transfer the dough to your working surface and roll it out into a sheet 30 cm in diameter, dusting with flour.
- With a pizza cutter, cut the dough in a snail shape and spread it on your working surface. Braid it in a cross shape (see photo gallery bellow) and transfer to a baking pan lined with parchment paper. Cover with a towel and let it rise for 30 minutes.
- Preheat the oven to 180ο C (350ο F) set to fan.
- Spread the egg wash over the whole surface of the dough, sprinkle with the sesame seeds, and bake for 40 minutes.
- Remove and serve.
See the procedure step by step in the gallery below. (For full functionality of this gallery it is necessary to enable Java Script)
![20200415_182837-02-01[1]](https://enogastronomista.files.wordpress.com/2020/04/20200415_182837-02-011.jpeg)
![20200415_174035-01-01[1]](https://enogastronomista.files.wordpress.com/2020/04/20200415_174035-01-011.jpeg)
Decorated Bread

Not as difficult as it may appear. This decorative bread is made from the same dough as any other hard flour bread. The only difference is the use of a well – sharpened blade with which incisions are made everywhere and all around on the bread. Flowers, ears of wheat, a sun, a smile, geometric lines, initials of a name or whatever else your fantasy desires. The only tip before cutting is to cover the loaf with flour. Dusting the top of your loaves with flour prior to scoring will ensure maximum contrast between white flour and dark baked crust. Follow instructions and have fun!
![20200411_173757-01[1]](https://enogastronomista.files.wordpress.com/2020/04/20200411_173757-011.jpeg)
![20200411_172537-01[1]](https://enogastronomista.files.wordpress.com/2020/04/20200411_172537-011.jpeg)
![20200411_172420-01[1]](https://enogastronomista.files.wordpress.com/2020/04/20200411_172420-011.jpeg)
Ingredients:
- 500g strong white flour, plus extra for dusting *
- 2 tsp salt
- 7gr fast-action yeast
- 3 tbsp olive oil
- 300ml water
*Strong flour, also commonly known as strong bread flour, is made from hard wheat varieties. It contains more gluten (12% to 14% gluten content),than other types of flour which gives it its elasticity and enables the dough to rise with a good structure.
Method:
- Heat oven to 220°C/ 428°F
- Mix 500g strong white flour, 2 tsp salt and a 7gr of fast-action yeast in a large bowl.
- Make a well in the centre, then add 3 tbsp olive oil and 300ml water. Mix well. If the dough seems a little stiff, add another 1-2 tbsp water and again mix well.
- Tip onto a lightly floured work surface and knead for around 10 mins.
- Once the dough is satin-smooth, place it in a lightly oiled bowl and cover with cling film. Leave to rise for 1 hour until doubled in size.
- Line a baking tray with baking parchment. Knock back the dough (punch the air out and pull the dough in on itself) then gently mould the dough into a ball.
- Place it on the baking parchment to prove for a further hour until doubled in size.
- Dust the loaf with some extra flour
(Dusting the top of your loaves with flour prior to scoring will ensure maximum contrast between white flour and dark baked crust.)
With a sewing thread form a cross on the dough. Then on each fourth format, draw 2 other lines as in the gallery photos
With a sharp razor make small incisions on the sides of each line – from the top to bottom- so that it looks like an ear of wheat.
Bake for 25-30 mins until golden brown and the loaf sounds hollow when tapped underneath. Cool on a wire rack.
![20200411_172514-01[1]](https://enogastronomista.files.wordpress.com/2020/04/20200411_172514-011.jpeg)
![20200411_154719-01[1]](https://enogastronomista.files.wordpress.com/2020/04/20200411_154719-011.jpeg)
Goat Leg Oven Roasted with Hasseback Potatoes

The simplest and easiest recipe with goat meat. The simpler it is, the more it retains its flavor. Only herbs, vegetables and very little olive oil make this dish a real delicacy.
![20200411_194307[1]](https://enogastronomista.files.wordpress.com/2020/04/20200411_1943071.jpg)
![20200411_194707-01[1]](https://enogastronomista.files.wordpress.com/2020/04/20200411_194707-011.jpeg)
Ingredients
- 2 legs of lamb about 1.5 -2 kgr
- 1 bulb garlic
- bunch of rosemary
- sea salt and black pepper
- 2 carrots
- 2 onions
- potatoes
- olive oil
Method
-
Preheat the oven to 200°C / 392°F
-
Use a small, sharp knife to make some slits all over the lamb. Peel two garlic cloves and slice them into shards. Roughly squash the remaining garlic and put into the bottom of a large roasting tin.
-
Push a few slivers of garlic and small sprigs of rosemary down into each slit in the lamb and season with plenty of salt and pepper.
- Prepare the Hasselback potatoes *
-
Put the carrots, the onions and the potatoes into the roasting tin, drizzle with olive oil and season with salt and pepper. Lay the lamb on top and roast in the preheated oven for about 60 min , until cooked to your liking.
- When cooked, remove the lamb from the oven and transfer to a board. Cover with foil and leave to rest for 15- 20 minutes.
*Hasselback potatoes. See how to cut them step by step here>> https://enogastronomista.com/tag/hasselback-potatoes/
![20200412_140007-01-01-01[1]](https://enogastronomista.files.wordpress.com/2020/04/20200412_140007-01-01-011.jpeg)
![20200411_161908-01[1]](https://enogastronomista.files.wordpress.com/2020/04/20200411_161908-011.jpeg?w=471&resize=471%2C628#038;h=628 "20200411_161908-01[1]")
![20200411_162009-01[1]](https://enogastronomista.files.wordpress.com/2020/04/20200411_162009-011.jpeg?w=471&resize=471%2C628#038;h=628 "20200411_162009-01[1]")
![20200411_181641-01-01[1]](https://enogastronomista.files.wordpress.com/2020/04/20200411_181641-01-011.jpeg?w=946&resize=946%2C710#038;h=710 "20200411_181641-01-01[1]")
![20200411_163717-01[1]](https://enogastronomista.files.wordpress.com/2020/04/20200411_163717-011.jpeg)
Easter Stenciled cookies

One of the easiest and prettiest ways to decorate the cookies and enjoy time during quarantin days with your childrens…
![20200410_173555-01-01[1]](https://enogastronomista.files.wordpress.com/2020/04/20200410_173555-01-011.jpeg)
![20200410_173157-01[1]](https://enogastronomista.files.wordpress.com/2020/04/20200410_173157-011.jpeg)
![20200410_173351-01-01-01[2]](https://enogastronomista.files.wordpress.com/2020/04/20200410_173351-01-01-012.jpeg)
Ingredients for 15 cookies:
- 190 g butter, at room temperature
- 110 g icing sugar
- 300 g all-purpose flour
- 1 teaspoon vanilla powder
For the decoration:
- Cookie cutters of desired shape
- Cocoa Powder
- Pastry brush
- Stencils
Method:
- Add the butter in a mixer’s bowl and beat it with the paddle attachment at high speed, for 4-5 minutes, until fluffy.
- Add the icing sugar and keep beating for 4-5 minutes using the paddle attachment at low to medium speed.
- In a bowl, mix the flour with the vanilla and add them to the mixer. Beat for 2-3 minutes until the mixture looks like wet sand.
- Remove the dough from the mixer and knead it with your hands until it is thick and malleable.
- Divide the dough into 2 pieces. Transfer one of the pieces to a baking shett lined with parchment paper. Cover with another piece of parchment paper and, with a rolling pin, roll out the dough until it has the same size as the baking sheet.
- Remove the parchment paper and cut the cookies using the cookie cutter. Follow the same process for the remaining dough, too.
Decoration:
- Place the stencil on top of the cookie. Use a pastry brush to pick up cocoa powder and pat the cocoa powder onto the stencil.
- Lift away the stencil carefully. Do the same for the rest of the cookies, then bake for about 15 min (180°C / 356°F)
![20200410_160958-01[1]](https://enogastronomista.files.wordpress.com/2020/04/20200410_160958-011.jpeg?w=234&resize=234%2C311#038;h=311 "20200410_160958-01[1]")
![20200410_161319-01[1]](https://enogastronomista.files.wordpress.com/2020/04/20200410_161319-011.jpeg?w=234&resize=234%2C311#038;h=311 "20200410_161319-01[1]")
![20200410_161646-01[1]](https://enogastronomista.files.wordpress.com/2020/04/20200410_161646-011.jpeg?w=233&resize=233%2C311#038;h=311 "20200410_161646-01[1]")
![20200410_162238-01[1]](https://enogastronomista.files.wordpress.com/2020/04/20200410_162238-011.jpeg?w=233&resize=233%2C311#038;h=311 "20200410_162238-01[1]")
![20200410_164902-01[1]](https://enogastronomista.files.wordpress.com/2020/04/20200410_164902-011.jpeg?w=234&resize=234%2C311#038;h=311 "20200410_164902-01[1]")
![20200410_164944-01[1]](https://enogastronomista.files.wordpress.com/2020/04/20200410_164944-011.jpeg?w=233&resize=233%2C311#038;h=311 "20200410_164944-01[1]")
![20200410_165150-01[1]](https://enogastronomista.files.wordpress.com/2020/04/20200410_165150-011.jpeg?w=233&resize=233%2C311#038;h=311 "20200410_165150-01[1]")
Koulourakia: Ancient Τraditional Greek Easter Cookies / Κουλουρακια βουτυρου
- After the establishment of Christianity as the official religion of the Roman Empire- – which also included Greece – by Constantine the Great, (Constantine was the first Roman emperor to convert to Christianity ) he was the first to offer as gifts to his officials, the so-called “palatine bread”, today’s butter cookies and sweet bread (tsoureki). The shape of these Easter cookies and breads varies depending on local traditions.The best known is the braid. Braids and knots come from pagan times, as symbols of the removal of evil spirits.
- So one of the ancient culinary Easter traditions in Greece is the butter cookies called “koulourakia” (kuluràkia). During Holy Week they are found in abundance in Greek bakeries and home kitchens. The dough is mainly made of butter and must be of excellent quality. Low quality butter will give horrible results without consistency, flavor and aroma. For this reason, every home has her favorite brand. My favorite brand is Greek from the historical region of Thessalia and it is the award-winning Flegga Dairy Company, synonymous with high quality for more than 60 years. The flour used for this recipe is a biological all purpose Italian flour; the same also biological eggs and organic oranges.
- Have a Holy and Blessed Easter 2020. Warmest thoughts and wishes to all the people who are suffering from loneliness and pain.
![20200407_174427-01-01-01[1]](https://enogastronomista.files.wordpress.com/2020/04/20200407_174427-01-01-011-1.jpeg)
![20200407_174026-01-01[1]](https://enogastronomista.files.wordpress.com/2020/04/20200407_174026-01-011.jpeg)
Ingredients for 35 – 40 pieces:
- 300 g butter
- 300 g granulated sugar
- 2 teaspoons vanilla extract
- 2 eggs, medium
- 120 g orange juice
- orange zest, of 2 big oranges or 3 small
- 50 g brandy
- 1 kilo all-purpose flour
- 1/2 teaspoon(s) baking powder
- 50 g milk
- 1 pinch salt
- 1 egg yolk, diluted in 2 tablespoons water
Method:
- Preheat the oven to 190ο C (375ο F) set to fan.
- In a mixer’s bowl add the butter, sugar, vanilla extract, and beat with the paddle attachment at medium speed for 5 minutes, until the mixture is fluffy.
- Then, add the eggs one by one, the orange zest and juice, the cognac, and keep beating.
- In a bowl add the flour, baking powder, baking soda, and mix with a spoon.
- Add half of the solid ingredients into the mixer, the milk, the salt, and keep beating for 1-2 minutes.
- Remove the bowl from the mixer, add the remaining solid ingredients, and mix with a serving spoon until the ingredients are homogenized. Then, knead with your hands until a dough is formed.
- Cut a 30 g piece, shape it into a strip, and wrap it like a braid (see gallery below)
- Follow the same process for the whole dough.
- Transfer the cookies into baking pans lined with parchment paper, spread with the egg wash (1 egg yolk, diluted in 2 tablespoons water)
- Bake for 15-20 minutes.
- Let them cool and serve
![20200407_173647-01[1]](https://enogastronomista.files.wordpress.com/2020/04/20200407_173647-011.jpeg?w=471&resize=471%2C628#038;h=628 "20200407_173647-01[1]")
![20200407_174916-01[1]](https://enogastronomista.files.wordpress.com/2020/04/20200407_174916-011.jpeg?w=471&resize=471%2C628#038;h=628 "20200407_174916-01[1]")
Chocolate Quinoa Flakes Breakfast
In these quarantine days where everything flows slowly, i taught my daughter how to prepare her own breakfast. This recipe is so simple that even a little girl can prepare it, obviously with the supervision of an adult.
Chocolate, quinoa flakes, smushed banana, milk and water. You only bring to boil these 5 ingredients for few minutes and it’s ready to eat. Quinoa Flakes are mechanically flattened grains of quinoa, similar to rolled oats; provide all the health benefits of whole grain quinoa with a more familiar breakfast texture and a much quicker cooking time)
Garnish with dried and fresh fruits of your choice or a ball of ice cream. As the cream does not contain sugar, agave or maple syrup cannot be missing. The advanced cream is kept in the fridge for the next day. Just add a spoonful of milk or water and heat it over low heat, stirring constantly.
For the presence of quinoa it is one of the most nutritious & healthy breakfasts for everyone. Quinoa is gluten-free pseudo cereal, high in protein and one of the few plant foods that contain sufficient amounts of all nine essential amino acids. (Ηistidine, Ιsoleucine, Leucine, Lysine, Methionine, Phenylalanine, Threonine, Tryptophan and Valine)
It is also high in fiber, magnesium, B vitamins, iron, potassium, calcium, phosphorus, vitamin E and various beneficial antioxidants.
![20200401_182957-01-01-01-01-01[1]](https://enogastronomista.files.wordpress.com/2020/04/20200401_182957-01-01-01-01-011.jpeg)
![20200401_184158-02-01[1]](https://enogastronomista.files.wordpress.com/2020/04/20200401_184158-02-011.jpeg)
Ingredients for 2 persons:
- 100 gr quinoa flakes
- 100 gr dark chocolate
- 1/2 cup milk (about 125 ml)
- 1/2 cup water (about 125 ml)
- 1 ripe banana mashed
Fresh and dry fruits cut into small pieces
Agave or maple syrup for topping
Method:
In a little pot combine the first 5 ingredients. Mix well with a spoon. Bring to a boil, then reduce over low heat and boil for about 2 – 3 minutes (until creamy). Stirring costantly
Serve in bowls. Top with fruits and a generous amount of agave or maple syrup.
As the cream does not contain sugar, agave or maple syrup cannot be missing.
The advanced cream is kept in the fridge for the next day. It should be firm, so just add 1 – 2 spoonful of milk or water, whisk together until incorporated. Heat it over low heat, stirring constantly
![20200401_184753-01-01-01-01-02-01[1]](https://enogastronomista.files.wordpress.com/2020/04/20200401_184753-01-01-01-01-02-011.jpeg)
![20200402_180733-01-01-01-01[1]](https://enogastronomista.files.wordpress.com/2020/04/20200402_180733-01-01-01-011.jpeg)
![20200402_181228-01-01[1]](https://enogastronomista.files.wordpress.com/2020/04/20200402_181228-01-011.jpeg)
Portokalòpita ( Orange pie con phyllo)
Portokalopita is a typical Greek dessert made of phyllo, oranges (Portokàli means orange) and syrup. There are various recipes for portokalopita. I propose the one with whole oranges in which the peel of the fruit is also used.
Orange peel has antimicrobial and antibacterial properties, containing high percentages of Vitamin C, is an indispensable aid for the immune system. Also is suitable against acidity, cholesterol and bacterial plaque in the mouth, helping digestion and intestinal transit. It is an excellent ally for those who have to fight cholesterol, as it helps to clean the arteries and counteracts the formation of clots, promoting cardiovascular health.
As it will be used the whole fruit, it is essential that it is organic and not treated with any type of pesticide.
![20200323_174000-01-01[1]](https://enogastronomista.files.wordpress.com/2020/03/20200323_174000-01-011.jpeg)
![20200323_174254-01[1]](https://enogastronomista.files.wordpress.com/2020/03/20200323_174254-011.jpeg)
![20200323_174320-01[1]](https://enogastronomista.files.wordpress.com/2020/03/20200323_174320-011.jpeg)
Ingredients:
For the syrup
- 700 g granulated sugar
- 500 g water
- juice of 3 oranges
For the orange pie
- 2 whole organic oranges
- 450 g phyllo dough sheet
- 250 g granulated sugar
- 250 g seed oil
- 250 g milk
- vanilla
- 3 eggs
(Some butter and flour for the pan)
To serve: chocolate or stracciatella ice cream
Method:
- Spread the phyllo sheets onto your working surface. Let them dry for 2 – 3 hours.
- Meanwhile prepare the syrup. In a pot, add the sugar, water, orange juice and transfer over medium heat. As soon as it comes to a boil, remove from the heat and set aside to cool.
- Preheat the oven to 180ο C (356ο F).
- With your hands, crumble the phyllo sheets until they broken up into small pieces. Place them into a large bowl.
- Wash and cut 2 whole organic oranges into small pieces. Remove the seeds
- Blend them into a food processor until they are almost pureed
- In the same food processor add all the other ingredients: 3 eggs, sugar, milk, seed oil, vanilla. Mix until blended.
- Pour this mix into the bowl with the phyllo. Mix very well with a ladle.
- Spread butter and sprinkle flour onto a 32×25 cm baking pan. Spread the mixture inside, bake for 90 min (180C / 356F)
- Remove from the oven. With a ladle pour the cold syrup over.
- Allow 30 minutes for the syrup to be absorbed. Cut in pieces and serve with chocolate or stracciatella ice cream.
![20200323_174720-01-01[1]](https://enogastronomista.files.wordpress.com/2020/03/20200323_174720-01-011.jpeg)
![Collage_2020-03-20_22_47_50-02-01-01-01-01[1]](https://enogastronomista.files.wordpress.com/2020/03/collage_2020-03-20_22_47_50-02-01-01-01-011.jpeg)
The oranges for this particular recipe must be 100% organic and without any type of synthetic pesticide. If used, must be derived from natural sources, not synthetically manufactured.
Herb Crusted Salmon Oven Baked
A very simply and tasty salmon recipe, full of omega 3, proteins, excellent sourse of Potassium & Selenium. Very high in B vitamins such B1 , B2 , B3, B5, B6, B9 and B12. Furthermore contains the antioxidant Astaxanthin.
Astaxanthin is a compound linked to several powerful health effects. As a member of the carotenoid family of antioxidants, astaxanthin gives salmon its pinkish-orange pigment. Lower the risk of heart disease by reducing oxidation of bad cholesterol LDL and increasing HDL (the “good cholesterol)
With the addition of herbs rich in indisputable properties, the dish that “marries” the land with the sea is a hymn to health and taste. The result is a flavorful crispy crust on the outside, while the interior impregnated with the flavor of the herbs is soft and tasty.
Serve it with oven baked hot potatoes chips, avocado, chia seeds, walnuts and a home made dressing made by mayonnaise, lemon and olive oil. If you have fresh biological eggs you can made your own mayonnaise.
The right recipe that fortifies the organism in these dark and sad times that we are currently experiencing. Don’t lose hope, don’t let panic overcome fear. Take care of you, of your health, of your mind, read books, paint a canvas, start a yoga course, create new unusual recipes. The enemy of fear is creativity. Eat healthly, stay strong and rest at home. Best wishes to all of you. From Italy with solidarity and positive thoughts.
![20200306_230147-02[1]](https://enogastronomista.files.wordpress.com/2020/03/20200306_230147-021.jpeg)
![20200306_135138-01-02-01-01-01[1]](https://enogastronomista.files.wordpress.com/2020/03/20200306_135138-01-02-01-01-011.jpeg)
Ingredients: Fresh salmon 2 pieces, olive oil
For the crust:
- 1/2 cup dry breadcrumbs
- sprigs of parsley
- sprigs of mint
- sprigs of thyme
- sprigs of marjoram
- 1 garlic glove (optional)
- CRUST: Place all ingredients for the crust into a blender. Pulse several times until is homogeneous green. Set aside.
Method:
- Preheat oven to 200°/ 392° F
- Place the mix of herbs+breadcrumbs in a dish. Press salmon all over into the green mixture to coat it on both sides
- Place the fish onto a tray (or cast iron pan). Drizzle a little olive oil on top
- Transfer the pan into the oven (200°C /392°F ) and bake for 15 min.
![20200306_141626-01-02-03[1]](https://enogastronomista.files.wordpress.com/2020/03/20200306_141626-01-02-031.jpeg?w=369&resize=369%2C492#038;h=492 "20200306_141626-01-02-03[1]")
![20200306_141938-01-01-03[1]](https://enogastronomista.files.wordpress.com/2020/03/20200306_141938-01-01-031.jpeg?w=200&resize=200%2C492#038;h=492 "20200306_141938-01-01-03[1]")
![20200306_141552-01-01-01[1]](https://enogastronomista.files.wordpress.com/2020/03/20200306_141552-01-01-011.jpeg?w=369&resize=369%2C492#038;h=492 "20200306_141552-01-01-01[1]")
![Screenshot_20200321-174549_Instagram-01[1]](https://enogastronomista.files.wordpress.com/2020/03/screenshot_20200321-174549_instagram-011.jpeg)
![stay_home[1]](https://enogastronomista.files.wordpress.com/2020/03/stay_home1.jpg)
Steak Grilled Over Fire
![20200216_145104-01-02-01-01-01[1]](https://enogastronomista.files.wordpress.com/2020/02/20200216_145104-01-02-01-01-011.jpeg?w=471&resize=471%2C628#038;h=628 "20200216_145104-01-02-01-01-01[1]")
![20200216_145434-01-01-01[1]](https://enogastronomista.files.wordpress.com/2020/02/20200216_145434-01-01-011.jpeg?w=471&resize=471%2C628#038;h=628 "20200216_145434-01-01-01[1]")
![20200216_144425-01-01-01-01[2]](https://enogastronomista.files.wordpress.com/2020/02/20200216_144425-01-01-01-012.jpeg?w=550&resize=550%2C522#038;h=522 "20200216_144425-01-01-01-01[2]")
![20200216_144131-01-01-01[1]](https://enogastronomista.files.wordpress.com/2020/02/20200216_144131-01-01-011-2.jpeg?w=392&resize=392%2C522#038;h=522 "20200216_144131-01-01-01[1]")
![20200216_144312-01-01-01-01[1]](https://enogastronomista.files.wordpress.com/2020/02/20200216_144312-01-01-01-011.jpeg?w=471&resize=471%2C628#038;h=628 "20200216_144312-01-01-01-01[1]")
![20200216_140301-01[1]](https://enogastronomista.files.wordpress.com/2020/02/20200216_140301-011.jpeg?w=471&resize=471%2C628#038;h=628 "20200216_140301-01[1]")
Ingredients for the steaks:
2 boneless beef steaks 6 – 7 cm thick
salt + oregano mix
Ingredients for the dressing:
3 tbsp mayonnaise – 3 tbsp extra virgin oil – 1 lemon juice and lemon jest (In a glass jar add all ingredients together, cover tightly and shake)
Method:
- Remove the steak from the refrigerator. Let it reach room temperature — around 1 hour.
- Cut outer edges of fat on steaks, diagonally at 4-5cm intervals with a knife. Use a paper towel to absorb the moisture from the meat. Dry meat forms the best crust.
- Sprinkle the mix of salt and oregano over the steaks into each sides. Massage well all over the meat.
- Build up the fire until you can have a deep coal bed large enough to cook your steaks on. (About the size of your grill rack).
- Set the steaks on the grill. Let them sear on one side, once it’s acquired the Maillard reaction* color golden brown. After 7 min flip it, let it do the same on the other side. (For thinner steaks, about 3 – 4 minutes per side for medium rare it’s ok, but a 6 cm steak takes at least 7 minutes)
- Remove the steak from the heat, cover it with aluminum foil, and let rest for at least 3-4 minutes. This tip will allow the juices (myoglobin) to redistribute into the meat.
Serve with lettuce salad, top with the dressing.
Recommended wine: Chianti Clasicco. Typical Tuscan Red Wine – DOCG – Controlled and Guaranteed Denomination of Origin.
____________________________________________________________________________________________
Tips, tricks & info’s
- The blood red color liquid in the steak is not blood at all. It’s myoglobin, a protein that only found in muscle tissue and delivers oxygen to an animal’s muscles; contains a red pigment- which why muscle tissue is red. As a steak is cooked, the myoglobin darkens- which is why the more “well done” the meat is, the grayer it looks. So rare* meat isn’t bloody, it is just cooked to a lower temperature
- *Rare. This refers to a steak that is been cooked for a very short period of time — leaving the centre red in colour. It’s just a stage up from raw meat — but cooked on the outside. Steak doesn’t contain parasites that chicken and pork do — eating it rare doesn’t pose any health risks
- *The Maillard reaction is a chemical reaction between an amino acid and a reducing sugar, usually requiring the addition of heat. Like caramelization, it is a form of non-enzymatic browning.
- You can use a digital instant-read meat thermometer. Check the temperature of the steak while it’s still on the grill. Grill the steak to your desired taste:
55°Celsius (130°F) for rare
57°Celsius (135°F) medium-rare
63°Celsius (145°F) medium
65,5 Celsius (150°F) medium well
and 71° Celsius (160°F) for well done.


